Showing posts with label FILM. Show all posts

1st Project me and Ivan is cooperating - "Gosha"

Locations

1. At home - Buying drugs, preparing drugs for swallowing, sniffing.
2. At Jakes House (Summer garden house) - Swallowing and waiting for the flight
3. Airport - Still in progress
4. Ambulance - inside of the car (bed)

Splitting responsibilities


We have found a very good way to work together. We try to stay in our qualities. Pre-production is one of the stages where we both work together, risk assessments, permissions and contacting actors. While Ivan is writing and directing, I am responsible for light, camera, and post-production.

We have done some test shots at home to see if our idea can possibly work out. We are filming in flat a colour profile with FujiFilm X-T2 (4K camera) and Nikon D5100. This year I am learning new ways of colour grading. Flat colours will be more flexible for the final edit. I am watching videos on Lynda.com and Youtube.com how to create and work with LUTs (Look up tables).

Stepping up with LUTs I can now choose my own colour scheme and use it in any footage we will film. I am creating individual LUTs for each scene.

LUT's I made are done separately for each video clip. I tried to look up is there a simple description what the LUT colour grading means in simple terms. What I figured out - Look up tables actually explains themselves. In an extreme way, I could tell the camera to see all blues as green colour. Each colour has its colour code or address in a table. Each colour code is captured by the camera sensor. Applying LUT basically means to change colour code to a different one. There are two different LUT systems - 1D which I see as a point system and 3D which uses curves and regenerated colour palette.
I am exporting certain frames in .TIFF to manipulate more colour information. Using still image I redo colour coordination. When that is done, divide all adjustments from the still image and export in .Cube (LUT format). Import the LUT into Adobe Premiere Pro and apply on the video clip it was made for.

It took me time to learn all of it, but once you know it, it saves a lot of time in post-production.
-----------------------------------------------------------------------------------------
-----------------------------------------------------------------------------------------

Next bit is about my workspace. Quicker editing and improving quality.
As I said, I want to use my last year in university to prepare myself for the industry. So I learned a new programming language (.INI). This language lets me code peripheral devices (anything that is plugged into the computer, like a keyboard).


Many editors spend a lot of time going through navigation panels to find the right tools or adjust something, it takes a lot of time. There is a solution like Tangen Ripple or DaVinci Resolve Controllers, but they cost 2000 pounds and more.
Basically what these controllers do - Each button or slider works as a shortcut for certain actions. One button can apply colour adjustment layer, edit sound levels or buttons can be assigned to certain colour channels. Editors do not have to go all panels through to find colour editing tools or transformation tools. Everything is on one controller - physical buttons.

It is also really hard to always remember long shortcuts like CTRL+ALT+SHIFT+R to start 3D rendering.

I know that there are keyboards with macro keys (MACRO KEYS - shortcut buttons that can be customized for certain actions). My main keyboard has 6 macro keys. But it is not enough to apply all necessary tools. 

Windows do not understand if there is another keyboard plugged in. It will register both keyboard keys as one. So I cannot assign keys to my own shortcuts.

I looked up online and I found a forum (Flight Simulator) where people assign 2nd keyboard for gaming. They use a separate keyboard to assign keys for radio, distance, altitude, temperature and other controls that are not easy to access while you are flying a plane. They use .INI code to program the second keyboard as a new device.

So first I coded my second keyboard. the script basically divided both keyboards and I can assign hotkeys to one.
After that, I am writing a code for Adobe Premiere Pro. I am still in the process, but it looks promising. When it will be done, I will have 141 extra hotkeys to play with. Technically I can assign new keyboards as much as I have USB ports. I can have an individual keyboard for each software and ease my workflow.

In the end I am also saving a lot of many as well.


Don't push your weaknesses, play with your strengths (Jennifer Lopez)

At first, I wanted to find myself in other areas, like directing or script writing. I tried to push myself in directions I have not done before and therefore I struggled for weeks coming up with my first idea (hacker short-film). After class presentations, I thought once more what do I really want to achieve with my portfolio and where I want to end up.

It is the last year of university and I need a good portfolio in order to get the job I want. I would like to work in a team where I am responsible for visuals. I want to push myself to the limits, proving directors that what is written on a paper can be achieved easily. I am gaining knowledge of new gear, new editing software, and filming techniques as much as I can. I'm going to realize the visions of film directors to the last detail. For industry, I want to improve the way how the story has been told. If the story is developed and presented in a better quality using creative ways that have not been seen before it can reach a lot more people and spread the story further. So because of me, the story can be told better.

Teamed up with Ivan.
The journey starts here...


CONCEPT
A fictional 10 minute short-film reflecting privacy of digital world and public data in 2017. Privacy is not about "to hide" - Privacy is about "to protect". I also wanted to show that you really never can get out of the loop once you have done wrong things in the past.

DESCRIPTION
Two best friends used to prank classmates in college using their social network data. Now they are university students, playing video games every Friday. One evening they meet and laugh about time in college, sharing how paranoid some classmates were. It was nothing very serious, only changing profile pictures on Facebook and sending naughty emails from other accounts, or just sending old archive photos. After one friend leaves his house, other goes upstairs and just takes a quick look online. A new chat window pops-up saying "Hi". He replies just for fun.
The conversation goes to the stage 1 where the money has been requested in one hour of time. Only GBP 50.00 but the guy just laughs and replies in a rude way. The stranger knows this guy and in a response includes some facts about his life.
Stage 2 requesting GBP 500 in exchange for peace.. He shuts the laptop, grabs the phone and calls his best friend telling how weird is this stranger.
Stage 3 - The young teenager receives a text message showing that the stranger wants to publish a private photo archive of him, the amount of money has been increased again. He agrees to pay, but only if they meet in real life. Old pub, main character sees a guy in his fifties sitting at the bar. The student asks to go outside to have a cigarette where his friend was waiting with a knife. Finally there are piece and they did not loose any money. then they both receive text:"STAGE 4 - It was just a joke, I still want my money".

CONTEXTUAL UNDERSTANDING
I think I really want to focus on technical side after graduation. I want to explore more of Adobe sweets. I will focus on camera techniques, use of colour, audio, lighting and editing. 

RESEARCH
I don't want to make this short-film like any other hacker film. there won't be any "Matrix" green binary codes. I want to make it more realistic and simple, how new users never protect themselves, they go against the rules by the saying "The best defense is the attack".

Research theories of surveillance.

Michel Foucault - Surveillance and Crime Control
Bentham - Surveillance and Critical Theory

New media does all so people think they have choices - therefore, their underlying thoughts and desires - are unique, rather than programmed and shared with others

TECHNICAL AND CREATIVE SKILLS
Adobe sweets, I want to use some new lighting techniques and learn more of audio.
At the moment I will use low key lightning and a camera that is good in low light conditions. (FujiFilm X-T2)


_______________________________________________________________________

How does anonymous connection works?


Okay...
I got the dancer two weeks ago. Replied to all questions and had a tutorial with Rosie. Because my initial idea has to be filmed using a fully able-bodied dancer we had some problems representing disability. Ethics and emotional feelings may be touched of someone who is actually a disabled dancer. Therefore I thought about messaging Stopgap community. I emailed 3 times and no response. It is the week before dissertation proposal should be submitted.

I finally got the email back. There is no reason to stop me film this idea... BUT - I have run out of time and I have to find a new way to finish this project.

I was helping Ivan with his project, I promised to be his camera operator. He offered me to collaborate and I agreed with a smile. I took over camera operator and editor role.

In the same time, I kindly said no to all dancers I had for my dance video idea...


White Wedding


White Wedding’s inspiration comes from marriages, and all the difficulties they carry. The video is set during the breaking moment of the couple, who lack affection and caress for each other resulting in the birth of pure evil.
White Wedding is a music video based on a broken love story, with a ‘dark comedy’ gist. It follows December and June a recently wed couple, they quickly realize their relationship is deteriorating over small arguments. Growing distant they chase each other throughout the corridors of the decaying mansion they once called a happy home. The chase sequence is created in cinematic montages for an opportunity to capture the decaying beauty of the old manor along with December/June’s outfits. As the video extends both June and December become increasingly rough and hateful to one another; it is then June gives birth to a pile of guts (evil) rather than the beautiful baby they once wanted, in return for their aggression, violence, and repulsiveness to one another.
“The greatest evil is physical pain.” – Saint Augustine


Special Effects in the film industry is something that actually pulled me into this course.

I have always wanted to do some computer animated effects. I decided to go with DFSA because it included special effects and different computer-generated installation. When I was a little kid I was always amazed by all these animations, they had never been drawn on a paper. they were generated by a computer. Even now I am still amazed by this film area. I love the fact how special effects have been developed adding physics and very complicated maths to make artificial look almost real. I like the beauty of CGI that immerses the audience in this fake reality.

Adobe After Effects

This is one of the most interesting Softwares I have been using in video making. Philip thought many new things in the 1st year of DFSA. We were given basics for text animation, video digital stabilization, mapping, rotoscoping, masking and layering using different layer modes.

It was very bizarre at first but I had a huge interest in this. I fall in love with this fake reality that I can merge together with real life footage.

In my opinion, After Effects is a tool to make you vision and put something of your dreams. It is a tool that fully gives you the potential to change the reality, given material. I believe at one point I can achieve a level where it is hard to tell what is real and what is not. That's what I like about VFX. A power over others. To make them believe something that actually is not there. It makes me think that Special Effects is something very close to a chance of sharing dreams. It is my creativity, right? I can share my vision even if it is not possible in real life and represent it on a screen.

SOFTWARE

Adobe After Effects itself left my mind in a mess. I had basics... But it is a tool that can do way more than just text animations following an object in the video. The second year is the year where I actually explored it very indeed.

I got my mind around it, there are few bugs, but there are always an option to do it in a different way. I like AE, because it lets us think. there is not only one way of doing things, even technically there are many options to achieve the look you want.


 First days I spent on the thing I usually do before any edit. I sort out my files, so everything is renamed, commented and labeled. After I did file management I easily got on the track. synchronized the sound, and put clips one by another, comparing which take is the best.

 Later on, I did all transitions, tried to pan and tilt digitally as well. some shots ar stabilized. There is also time warped video clips.
Colour grading was challenging. I faded them and gave them more dreamy look. I tried to keep an eye on histogram and RGB bars. At the end I added letterbox.
 When all scenes were finished, I did all exporting rules step by step. Colour bars, tone, and a clock. as the last thing, I left credits.


It all started with only one photo...


Photograph by Hannah Starkey – Untitled 1997


A photo, which is very simple, but in the same time - very beautiful. A young lady holding a butterfly by the wing.
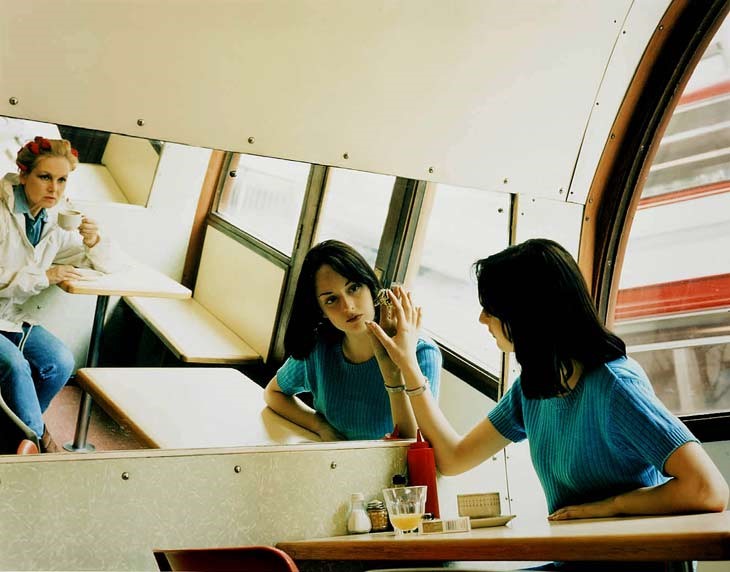


We had this image as an inspiration to make a 3-5 min long film. It was a process with many obstacles and challenges. First, the idea to make sense and still relate to the picture above. I think we had many opinions in the group how far to pull the idea. Romantic, sci-fi, action maybe comedy genre. My group had different main ideas, different thoughts about the ways of all ideas.


The film was filmed in two days. Files were saved on few hard drives to make sure, everything will be safe and nothing is going to be lost. Later on, I was in charge to deliver all visual files on the server with Victoria's help. That's so far about the process before the edit.


Have I changed thoughts about Avid since the first post?


I think it is very important how experienced you are before looking on new editing software. I mentioned AVID experience before on one of the first "Studio Shoot" posts. I would say it is very complicated editing software, it took me time to figure out how the tools are called. They are very different from other companies. 
My first "VIDEO EDITING" experience I gained when I was 16. It was Sony Vegas Pro. 
I remember it very as very complicated, futuristic and professional tool for videos. My friends were using programs called Movie Maker and iMovie and felt good using something much more advanced. I learned basics of video editing. Dual cameras, layering, 3D texts, stabilisations, cropping, panning, tilting, blending, key-framing clips and volume. I really thought it is something amazing...

Then I got in Adobe Premiere. A completely new world for me. I am not gonna lie - Using Premiere for about 1 month and coming back to Vegas Pro was horrible. I could not believe I was able to edit on Sony Vegas Pro before, it looked so cheap and there was nothing to use for professional editing. Using Premiere for about year I needed to step up more. So I began to learn how to use Adobe After Effects. Seriously, I did not learn it properly till I met Phil in UCA. 

The second year in university, still using Adobe sweets.

"Avid? Industry Standart, hah? Yeaaaa, right... what even is that???"
Opening Avid was like going back to 90ies, but I guess it was only because of the light gray interface. The learning process was very complicated. I would say it was because of how the things were called. I was used to Sony Vegas Pro and Adobe Premiere tool names. It was almost like learning a new language. You have to go through all so you know what the tools actually do and what Avid meant to mean with these names. For example, under effects, there is a tool panel like Illusion FX and without clicking on it I have no idea what even that means, is there 3D effects, maybe transition effects for the text or just textures...

Anyways, figuring out basic tools and trying to edit some sample files I had a bit of taste how it works. To be honest, I have to say I really hated it. I mentioned in the previous post about AVID that I can see how it is good in the industry. It is amazing with transcoding and transferring data from one computer to many others. In my opinion, Avid Media Composer is used for many huge films just because of the workspace. Many editors can work on one film without interrupting others.

Bearing that in mind I would not use Avid for my own small projects, short films or music videos. It is a pro tool for crews and TV industry.


---------------------- The Edit ----------------------


I often face a situation when something goes wrong in the most important moment. The first day of edit - Arturs is at home ill boiling in the bed with 38-degree temperature... How nice is that...

I knew I have to catch up with others in next Monday. Victoria helped me to import all the footage and at that point, everything was a mess...

A mess... where to start from? There I was, sitting on a red seat in front of 3 monitors.

Quickly I looked for a script. I watched every single video and listen to all sound files, wrote a note to each file, which scene, which slate and which take it is. The first day was basically defining files. I organized bins and files. replaced them. On the end of the day I had:

"Day 1" - All videos from the first day [ Renamed - repositioned in order]
"Day 2" - All videos from the second day [ Renamed - repositioned in order ]
"Audio" - Folio sounds
"Audio 2" - Tascam / boom mic records [ Renamed for each take]

...and nothing on the timeline yet.

I don't what exactly but I like a lot more how you can manage your files in Avid Media Composer than in any other video editing software.

---------------------------------------------------------------------------------


I said the software looked like from 90ies because of the interface so I looked up how to change that, setting > interface and made it darker. It looked more like "Premiere". I think bright interface just takes my attention where I don't need it. In a dark one, nothing else interrupts me. Maybe it is just in my mind, but generally, I felt a lot better and more focused on the whole editing process.


---------------------------------------------------------------------------------

Putting files on the timeline...

At the first glance, I had no confidence about what I am doing. I began with the 1st scene, put some in and out points, dropped on the timeline and did some synchronizing with a sound together. After 2 hours of an edit, I realized that I have to make more sense of my edit. Am I going for sad mood? Am I going for an experimental film? 
I looked through and some of the files did not make sense to me. There was one missing scene, which needed to be simulated by another hospital scene, I thought, it will be too obvious. I missed already one day being ill and I was in a bit stressful situation. 

Over sudden, I did not like the idea of the clock. I took that away and use another method of editing. I am not sure who said that but it keeps repeating in my mind, the film must look good even without the sound. 

I wanted to keep nowaday look, a bit futuristic, so I kept hospital scenes where the doctor passes them an iPad to show the results, I liked the fact how things have been changed over the time.

...THE STORY...

Things have changed and they will change more over the years. "Exhale, My Love" in my interpretation is twisted a little bit. Watching the footage I realize how cold are they without speaking to each other. It is not the script that makes like that, but the environment and their behaviors that make the mood. I loved the fact how everything in my film is pretty quiet and moody. 
At the very beginning, Elliot starts coughing and they appear in a doctor's office. Bella and he are very worried about the news, the possibility of cancer. On the first evening, she tries to cheer him up with a campaign. He starts coughing again, Bella calls an ambulance. New results show that he has a lung cancer. These results are serious and Bella cannot take that. She leaves him at the dinner. Next day, Elliot listens to a soundtrack. He remembers moments in winter, Bella smiling, singing to him. Bella hears the music, she comes to the room and leans on the wall. Elliot realizes that and helps her to stand up. He pulls her closer to the body and starts dancing. They both know that Elliot has to go soon. They cannot be together for long. Elliot inhales to say last words to Ella.


All that together.... and I was editing my "Final Edit" sequence.

I cut the clips without any sound and put on the timeline. I got used to tools that are on the left side of the timeline. Selecting single, selecting groups, deselect certain files or track, drag them, change them on the timeline. All tools are very different from Adobe. 

Colour correction. I did curves and basic contrast, brightness adjustments. Different scenes I used different filters. The light was not the same so used contrast and brightness as well. Later on, I offset my film using all four RGB curves and import a letterbox. When I had my letterbox on I had an option to move static files digitally. I tilt few static shots so there is a slight movement. Another reason for the letterbox - I have always the feeling that can't see all information if the image or video file is closer to the ratio 1:1 (square). I think - because how our eyes are positioned we need to have a square for each eye. That would be like 1:2. I feel like 16:9 is not really what I want to focus on. when the file has this frame around I am focusing more on the picture where the operator wants me to look at.

For tablet shots I used pan, tilt, resize and rotation tool to zoom out. I changed keyframe style as well so it is not so linear, but is very smooth and nice. One of the following shots I used stabilization FX. For Elliots dream scene, where Bella is in the snow, I used film grain illusion FX, I used frame morph so frames blend in next to each other. For particular shots, I used also glow effect. 

The sound was difficult for me at first. Although I had everything neatly organized I had issues with synchronizing sounds. In like 4 hour time I got my way around and everything was in time. I keyframed volume and blended sounds together. I used bensound.com to download a music file "Sad Day".

Credits were easy and especially rolling ones. I think Avid has thought about this part. The title sequence was very easy to work out. I liked the process of it.

---------------------------------------------------------------------------------

I think I gained a lot of new experience working with Avid Media Composer. Not only that but also working in a team made me more prepared for other shoots...

 In my opinion, there is only ONE THING I would like to change during the studio shoot. What I saw, I didn't like how my teammates were worried about things on the side. I think the major issue was that the wasted time on planning. I think everything is amazing if you can see how everyone know his role. I studied my role through and I know exactly where I have to be, when I have to shoot, who I have to listen to, who I can ask for help and so on. If you know your role inside out there should not be any misunderstanding and everything should go fluently. 

I enjoyed my group and I am happy that I learned new software just in few weeks. 


The story behind unknown dreams. 
There is only one concept, but two ways how to play it. Therefore I will be introducing the main idea first.
There is a guy or a girl who has danced all life. The dancer was very good at it, a talented and strong competitor to others. It wasn't only a hobby, it was a lifestyle, it was everything. Life for her or him changed in only one day. A wheelchair is not what you want in your dance career. You still can dance, but there are limits that may hold you.

DRAWING OR PAINTING?
PUPPETS?


DRAWING OR PAINTING- The Story Behind Unknown Dreams

The actor will be filmed in two different environments. First, an apartment, second the green screen studio which will be made in the post as an endless space (Dream).

1. The actor prepares his or her workspace for painting or drawing. Poors some water in the glass, takes pencils and brushes, clean the paper, find a rubber, sharpen pencils, find some colours. 
2. Few strokes on the paper, a B shot and back to the drawing or painting, seeing a person who could be called a dancer. 
3.  At this point, the artist falls into a dream...
4. It is himself in the endless space. He or she is on the floor, slowly standing up and paying a lot of attention to leg movements.
5. Movements are slow and gentle, nothing much with legs, mostly arm movements. 
6. The dance becomes active, very strong leg movements, wide and fast.
7. At one point it becomes so energetic and precise.
8. But... Soon he or she runs out of energy, especially legs. Slowly sits down and still moving arms.
9. Filming face and it morphs from the dream to an apartment.
10. Next shot - slides out of this drawing or painting which already finished, and the camera reveals, that the dancer in the dream is disabled, sitting in a wheelchair. As an alternative, we can use crutches.


PUPPET THEATRE- The Story Behind Unknown Dreams

The actor will be filmed in two different environments. First, an apartment, second the green screen studio which will be made in the post as an endless space (Dream).

1. The actor prepares his or her workspace. He or she finds sewing kit, puppets, strings, a bit of paint and some glue.
2. The doll is attached to these strings. The actor paints some new facial expressions and cleans the puppet. It starts to play around with it.
3.  At this point, the artist falls into a dream...
4. It is himself in the endless space. He or she is on the floor, slowly standing up and paying a lot of attention to leg movements.
5. Movements are slow and gentle, nothing much with legs, mostly arm movements. 
6. The dance becomes active, very strong leg movements, wide and fast.
7. At one point it becomes so energetic and precise.
8. But... Soon he or she runs out of energy, especially legs. Slowly sits down and still moving arms.
9. Filming face and it morphs from the dream to an apartment.
10. Next shot - slides out of this drawing or painting which already finished, and the camera reveals, that the dancer in the dream is disabled, sitting in a wheelchair. As an alternative, we can use crutches.

TECHINAL INSPIRATIONS


At the very beginning, I want to write down my possible ideas. For me, dance is something very personal. It is a relaxation for my body. I was doing Latvia folk dance for 15 years in my life and I can say that it is more about your thinking than your body abilities. It is a way to express your mood with no words.

IDEA #1

Continuing with Latvian folk dance, I would like to mention our festival "The Latvian Song and Dance Festival". It is one of the largest amateur choral events in the world and an important event in Latvian culture and social life. It is also a Masterpiece of the Oral and Intangible Heritage of Humanity. The All-Latvian Song and Dance Festival has been held since 1873, normally every five years. 30,000 is the grand total of amateur-level but supremely talented singers, dancers, orchestra musicians, folklore collectives, amateur theater troupes, applied arts and fine arts studios and others, devoting themselves to ethnic traditions at the Festival.

I took part in few years and I have old style not-edited old camera footage. It is the behind the scenes footage how everyone is preparing for the show. Training and fun have been captured with a mobile phone and old-model GoPros.


IDEA #2

Before any comments here are two dance video I made last year.

Okay... I may haven't thought this through very well, but my idea is to show our body movements and compare them with liquids, mechanics and daily objects we use for ourselves. My idea comes from the videos that represent traces. We watched many videos with a line behind the dancers, with a different environment that has been affected by the movement.
I thought, what if I can bring that one step forwards. Showing human trace in a dance and compare it with a thing we use on our daily basis. Showing similar movements, traces, and directions.

"Great Minds Think Alike" Creative Collective - We Live to Inspire, Not to Impress.... This is a line from a guy in a second video. They are from London and are happy to work together again.

J.Illustrations: "The results are perfect. Again, thank you for your hard work on the project and please feel free to contact me in case you have any other project it will be great to work with you again."

FOR INSPIRATION:

My goal for the audience?
To show how some movements in dance can be represented with daily objects.

I want to use after effects to show some traces, to understand more the direction and point for the motion human body does. For certain results, I want to make some time warping. I think I can technically use special effects to compare two different things. In my opinion, I will be struggling with getting a legal music, probably my choice with dancers will take long time and that will be the hardest part for me.

First filming day.
As a camera operator, I had huge responsibilities of the film overall. I had to rely on my assistant Ivan and get directions from DoP (TJ). Our first day's first take was an hour later than planned. I knew that I have to do my job spotless so there is no time delay because of me.

While actors were prepared I took my time assembling camera gear with Ivan. Set-up the camera and external video recorded. Checked colors, exposure, focus and formats to be ready for the first take.
We were using Sony EX3 camera which I have reviewed few post back. To record 10-bit 220x video we attached Atomos Samurai Blade external HD recorder. We also used shoulder rig and tripod to make the footage look nicer. As soon as everything was set-up I was looking through Samurai Blade screen and think of options for framing.

All the time I was co-operating with Tj and Ivan. There were many technical issues starting with battery life for Atomos Samurai Blade and ending with wobbly attachment plates for our camera gear. 

For certain scene, we used an on-camera filter. the filter we used suggested by Chris made the look dreamy. 
It took a while to decide and attach. Not only that but every single small detail took time. therefore Natalie and Preston did make sure before each shot everyone is ready.
 --CAMERA READY-- [press record] --READY--... --ACTION--  
After that, I kept the frame in best position. I tried to do my best.
I tried to focus only on my role, so I do mine as good as I can. I heard shouts on other team members and how they have done their roles wrong or not in time because they were focusing on something else during the shoot.
I did and didn't like to work in a team for several reasons.
I liked because I have one job to do and focus on. I am very technical and I like to be next to the gear. I was happy for my role and I understood everything that I was told - different wishes and suggests for framing and movement. I didn't like it because I saw how some of us were sitting down and not doing what they are supposed to do. I just hate slow workflow. I don't like to rush, but I don't like that there are people who can do their roles fast and quick and then there are members who even don't think what they have to do in first place. I liked to work in a team because you know who are your people. What I mean is that there is only one person who can help me - in this case - Ivan Camera assistant and only one person who I have to ask help or tell the problem - TJ - DoP. Roles make a big difference. It is not confusing, I don't have to run around to look for help or even ask random people who I have to look for.

I got this feeling when I am working on my own. If there is a problem I cannot solve, it might be a nightmare to find a solution from others.

I think it was a great experience. It also proved how contacts are made in this industry, simple if you are bad once, you are not going to be picked up next time. Certain roles are made for certain people. Not everyone is in the right place, but when they find it, they can manage it professionally without no doubt.

Studio shoot begun with a post weeks ago 'Role- Camera Assistant' - that was my chosen role to research. We had to research individually each department to present for everyone what the roles in film industry actually means. I was happy with my role, because I am technically interested in gear and techniques to use for filming. I have always been passionate about pushing the limits of quality.  I like to generate ideas of stories and main concepts, but it has never been as big as it is about my obsession for technology.

Camera department is my role indeed. I like the looks I could technically achieve. I like to challenge myself to make the shot more stable, more crisp, more detailed, more dynamic, more interesting and exciting. In my spare time I am reading a lot about new editing styles, new lighting, technology and filming techniques. I love to read articles of new Adobe Photoshop updates, how old tools can be used to achieve something new. There is always something new to learn. I am following latest updates of cameras, I am loving to learn new features. For example, I worked with GH4 and that was a good reason to find out what its features means - v-log and 4K MAX. I had what is the difference. Soon I was on articles and YouTube videos. I research from very beginning to advanced controls of V-log and 4K Max features.

I like to always be on top of everything that lately comes out. Before something has been released I have most likely already take a look on specifications, researched certain parts of camera's or other gear's features and trying to understand without looking at actual device. 

I guess my friends call me crazy because of doing it, but that's how I see art behind film, sound and photography.

Returning back to roles, for studio shoot I picked the role - Camera Operator. I guess could not wish any better, I was happy with my role at the very beginning.
 Pre-production was a pain for everyone I guess. I was pretty calm because I knew that my real work will be on the scene. Although I was CO, I helped Tarald a lot with the storyboard.

I drew storyboards with a help form Ivan, Natalie and TJ. When they were done I made them digital. I also helped Umor with lighting plans. We discuss in groups and explained those to Anne Parisio. I took part in lighting plans confidentially cause I had experience on sets like this before. Mostly for small interviews in Latvia, but still - those were whole scenes for full lightning including reflectors and diffusers. I used to help out gaffer at local television in my hometown Talsi.

As I mentioned before, I love research a lot of new techniques and gear, so I have seen many lighting situations and problems via Youtube and Fstoppers.com. I am learning film standards when I do have spare time.
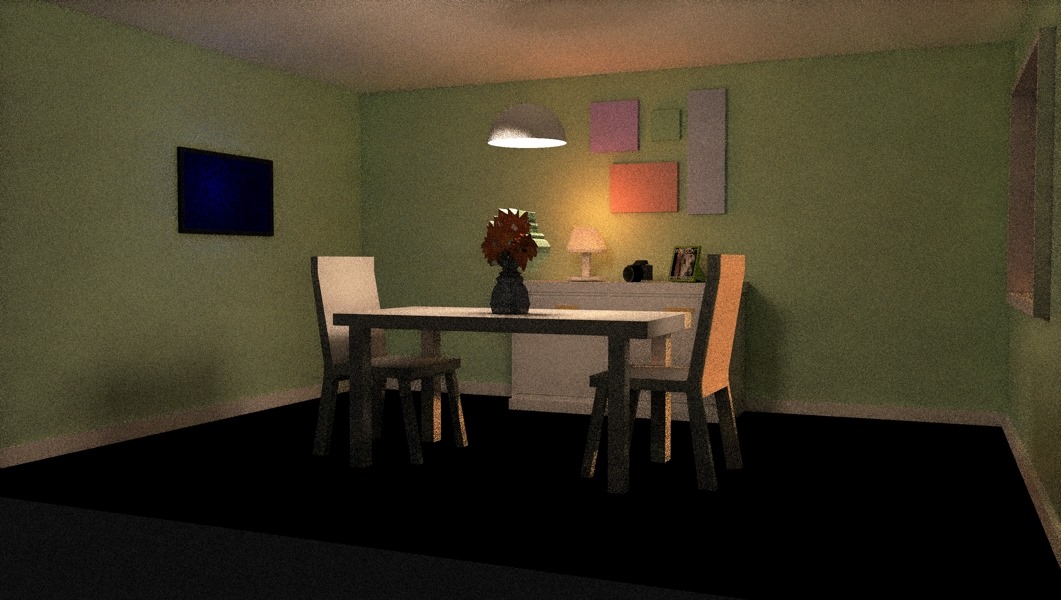
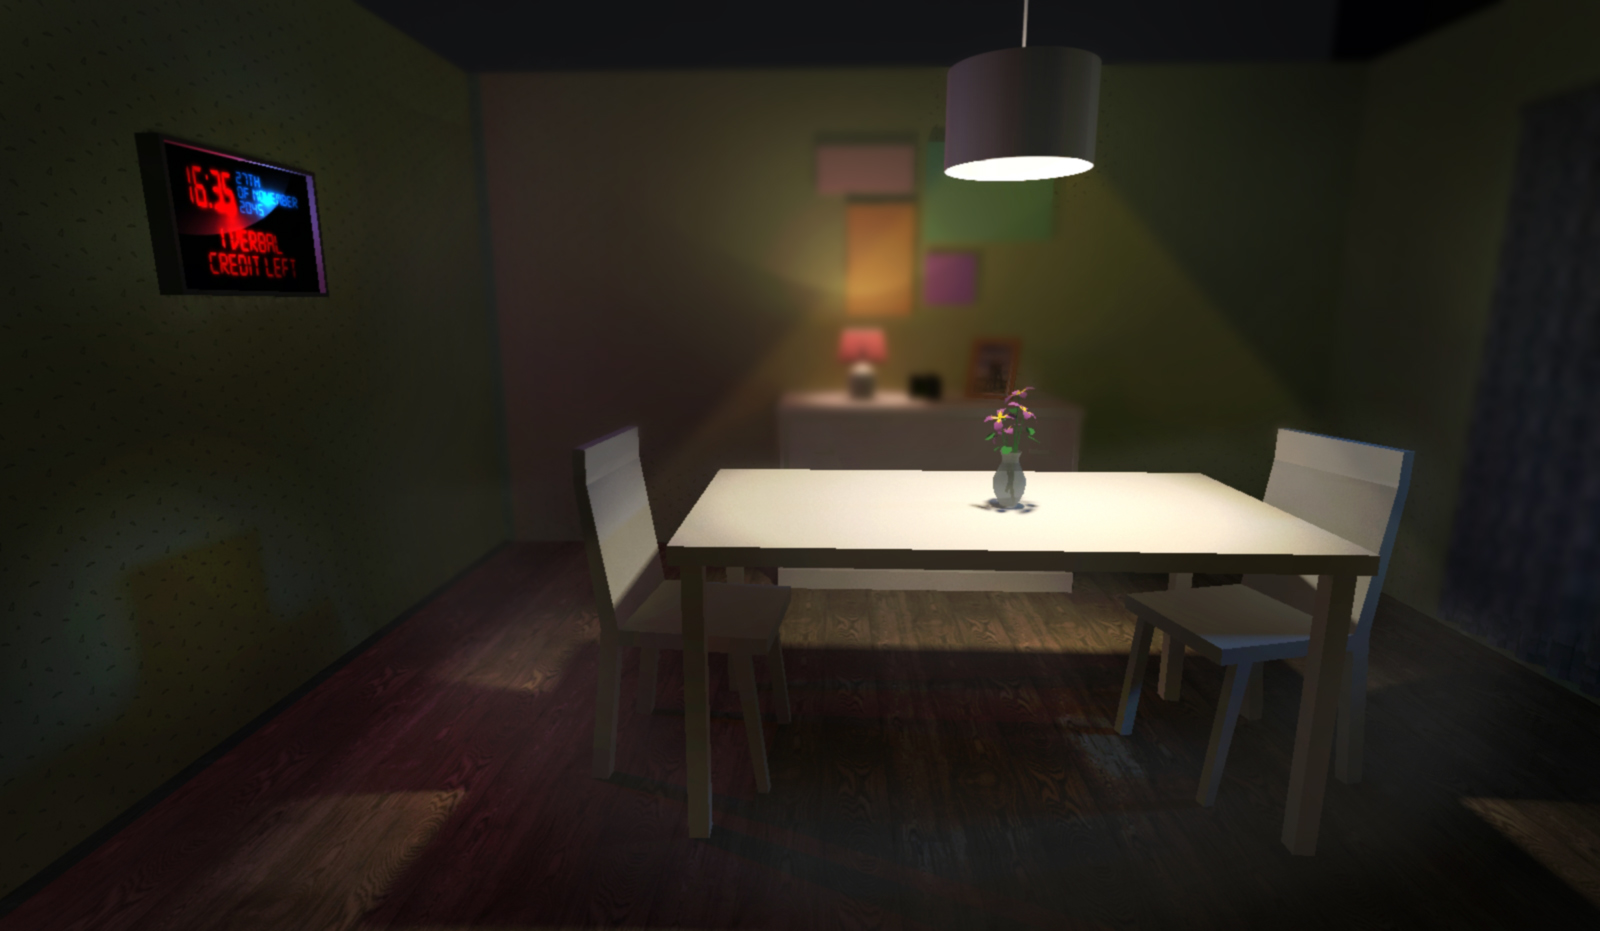
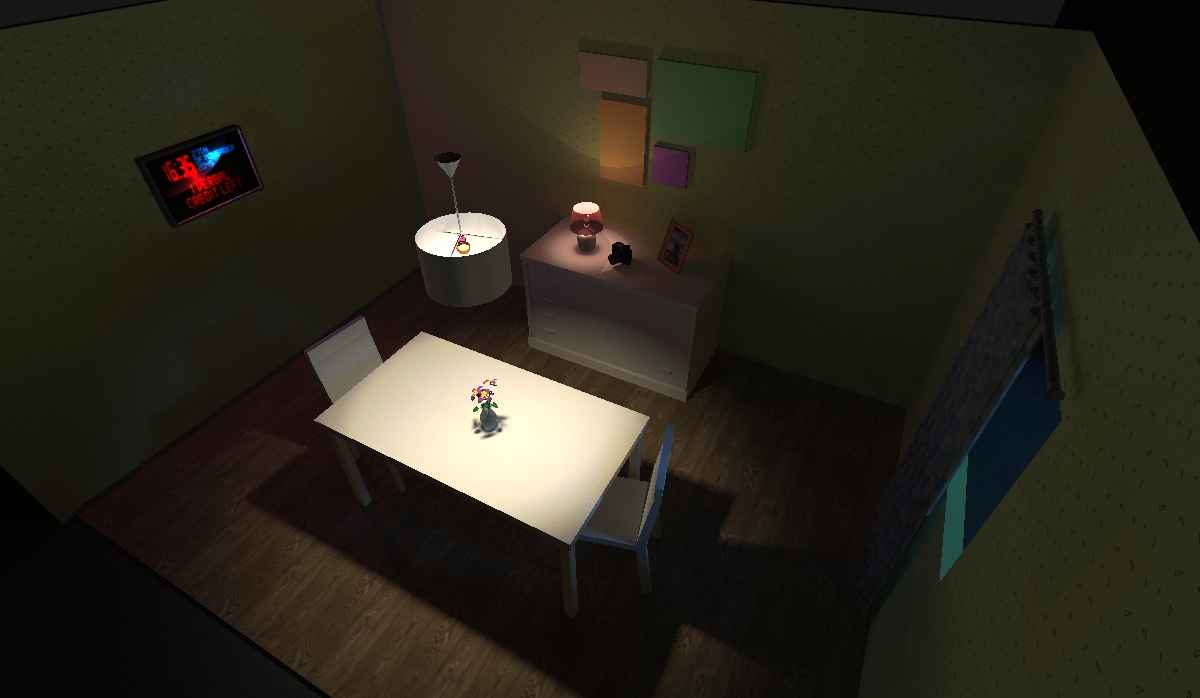
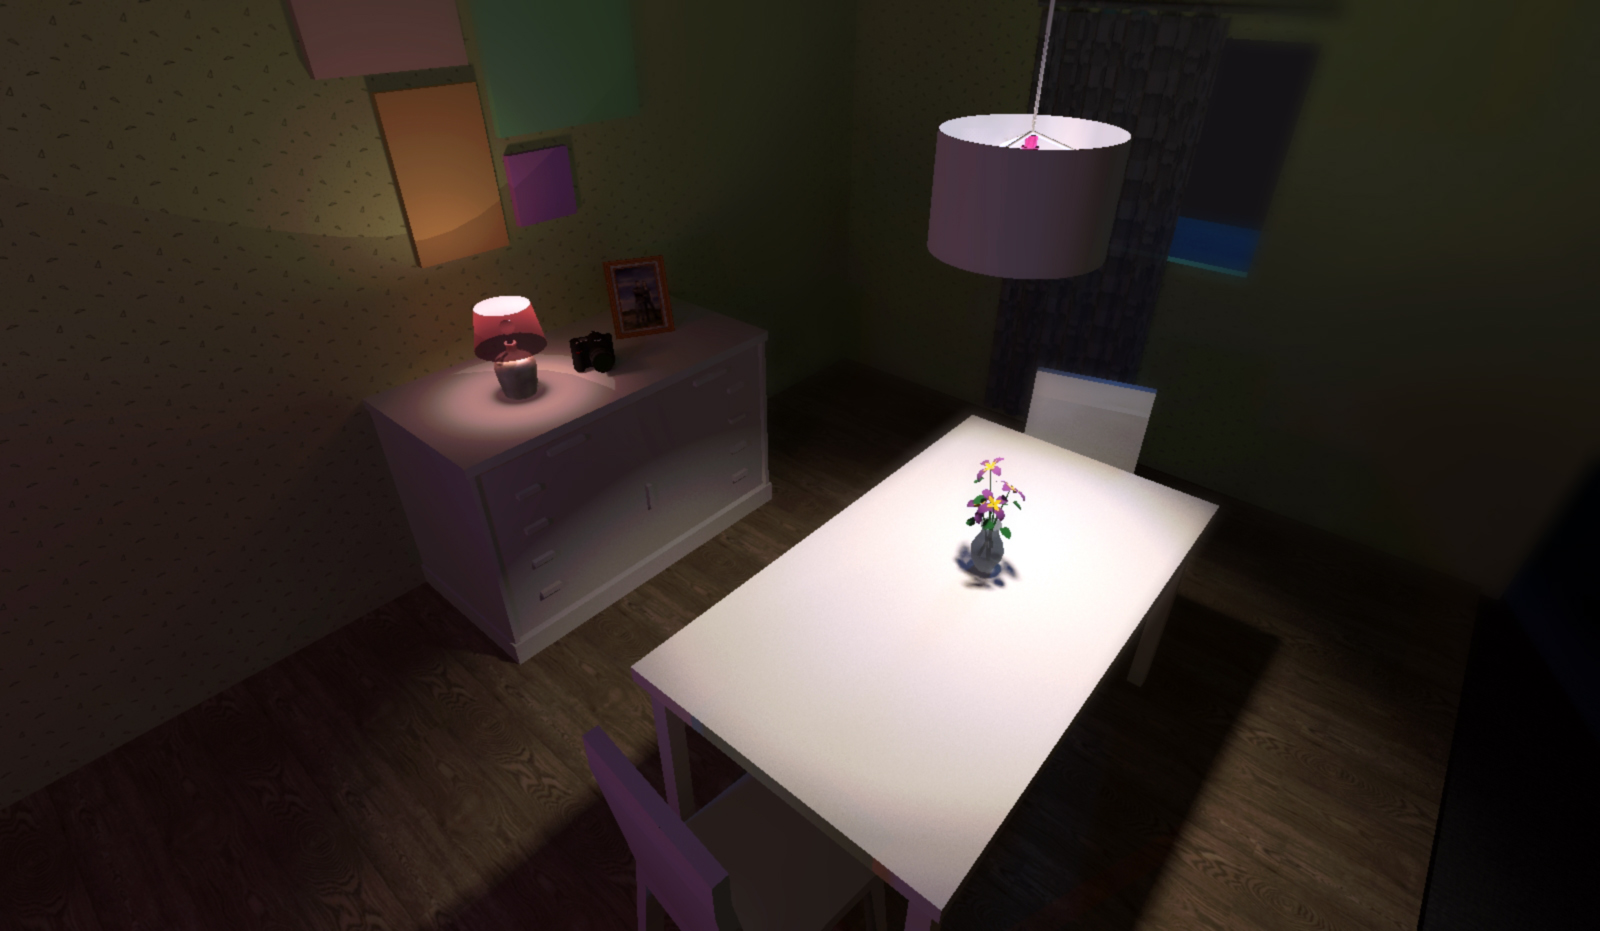
 While everyone was into polishing the story, I used my time for 3D project using SketchUp Pro.
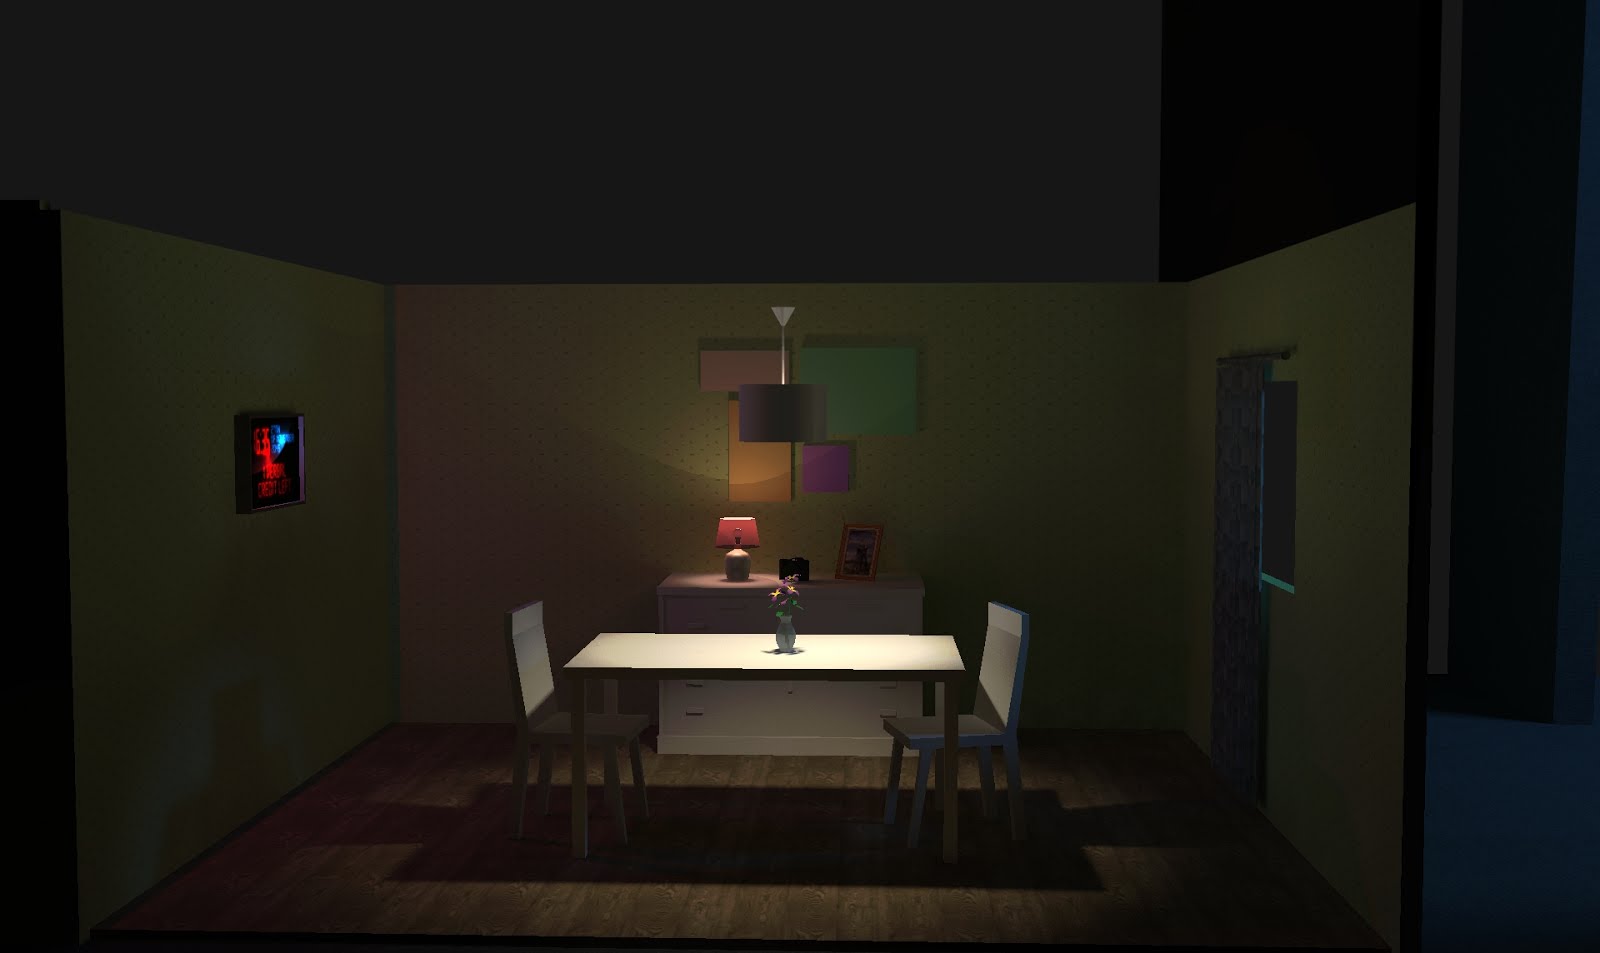
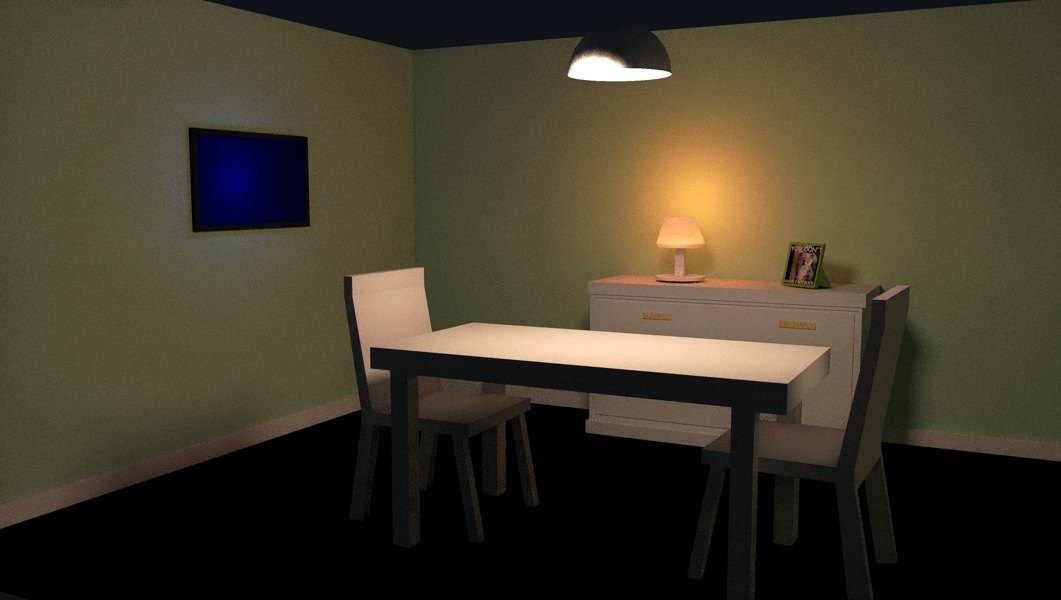
I made a whole set to show previews for possible camera angles and lighting. These sketches and previews from 3D program is at the bottom of this post.

WAS 3D NEEDED?

It was not necessary, but in my view it helps a lot for whole team to understand and feel a bit of the taste what they are going to look at. It can help a lot to see some problems, possible movements, angles and actual space they have to bear in mind.
I did it to make sure I am helping my team as much as possible. We have to put our support and time as much as we can to make our film successful!

Another digital thing I did together with Preston. Something must be on TV's screen. Animation. Preston did design for the clock and whole system which shows word count. My role in this was to make clock alive. I used Adobe Photoshop, After effects and Adobe Premiere to easy change the certain time and move alerts. We setup the word count and made animation so it looks interactive.
...This only one test for alarm. I made folders of files to make sure there is no mistakes and animation makes everyone happy.


Accelerate storytelling with the tools embraced by top movie, television, and broadcast editors. And power through HD and high-res editing. With that kind of inspiration we were inducted to Avid Media Composer. I have been working with 5 different video editing software so far and here I explored new editing software for the industry. On the first glance, I really did not like the "old-style" interface. All tools made no sense at the beginning. Looked very complicated and took a lot of time to edit.

"Fix color or set the tone and mood with built-in color tools. Quickly match colors from shot to shot using NaturalMatch. Correct color with precision thanks to advanced color space processing. Get fine control with animatable color correction. Speed up your color work with hands-on Artist Color control."  That's how Avid official page advertised their software. I have been using Adobe Products more than 5 years and I can say that it is much easier to colour correct footage in Adobe and it's plugins. It is more visual and instant preview compared to Avid. Bearing in mind that I can use plug-ins like Magic Bullet looks which gives creative tools to apply for colour correction and effects.
The image of one of the tutorials. We were editing two person dialogue in an office. We had few camera angles and needed to edit them in a certain order so it is pleasant to watch. Editing is art itself. You have to make sense and actual taste of the way how feelings work to each other. Using only cuts you are in charge who from both character is more dominative. You can make stressful or calm environment using time ad only tool for cuts. Different  styles of editing can completely change the mood of the whole story.

It is easier to import, faster previews and I prefer tools like cut, mark, stick together. They just work much smoother.
Using Avid for few week I have pulled out some good points to mention. Using it for broadcast and having quick simple edits it is perfect. Audiences today expect content to be delivered in the format in which they want to watch. Live TV broadcast. Streaming media. Blu-ray or DVD. On demand. On a mobile device. With Sorenson Squeeze Lite—included with Media Composer subscriptions or as part of the Media Composer | Production Pack—you can optimize media for the highest quality playback online or on disc. 
Not only fast transcoding is a huge benefit, but also sharing whole projects real time for editing. When it’s crunch time, collaboration is key. Media Composer makes it a breeze. Share media, projects, and bins to complete projects on time. Share assets using Avid shared storage. Collaborate with Final Cut, Premiere, and other editors. Share sound mixes with Pro Tools editors. Integrate directly with iNEWS and ENPS systems with the Media Composer | NewsCutter Option. And extend real-time production everywhere with Media Composer | Cloud.

Apart from sharing media and transcoding to life stream I really can't see reasons why it is better than Adobe products.  In my opinion, I will use it on big production teams where we have to work fast and simple as possible, quick colour editing, quick transferring between other editors and ease access to video materials. I have to agree that Avid has much better in preparing material for editing, it has all support plugins for certain camera formats. 


See No Evil, Hear No Evil, Speak No Evil


It is a Chinese saying, referring to the three monkeys of their divine pantheon. In another way, one can say indeed that if one tries to be positive in word, deed, and thought, that one can avoid doing evil and also avoid falling into the traps of the wicked. The evil ones fall into their own trap for seeing, thinking, listening to , and doing evil. In the film: Planet of the Apes with Charlton Heston, these three famous monkey poses are actually referred to in the ape trial of the human. Mainly because these three behaviours are considered as major sources of evil in themselves. I would say that our installation is presenting to the audience the result of evil behaviour. It is about the communication nowadays... Source can be completely innocent so as the speaker, but the messenger is the one who makes the rules. Particularly in our installation the way of changing the message is cleared in three ways.


HEAR NO EVIL - you can hear it, just don't pay any attention to it
SEE NO EVIL -  you can either cover your eyes and literally not see it, or pay no attention
SPEAK NO EVIL - You often can't help when you hear evil, especially rumours about others, speak no evil is about that you shouldn't repeat anything further.

Doing evil will be represented through 5 screens. On each of them - one person. As I said above, the source is innocent, follows three “monkeys” and the speaker:

Screen 1: a victim (the source)
Screen 2: a policeman (the monkey)
Screen 3: a journalist (the monkey)
Screen 4: a news editor (the monkey)
Screen 5: a news reporter (the speaker)


TV screens not projectors? Audience is always more satisfied of physical things that they can view from different perspectives. If the artwork is explorable, it takes the person more into the message that artist wants to tell. That's our main goal - To deliver our idea and our thoughts to the viewer more efficient and much faster. We gather that physical installation is much more powerful and more interactive than just a projection on the wall.


To make some ideas of screen positions we took a look to other artists.


Valie Export, video installation at Charim Galerie, (2012)
TV screens are on many tables facing towards audience. It takes a lot attention but in same same the number of screens disturbs the viewer and making focus on many visuals.
Another installation that inspired us was made by Andy Warhol: Motion Pictures at The Museum of Modern Art, 2010.
Andy's work took us because of portraits. Our problem will be showed through portrait series on the screen. It is interesting way to deliver the message. People usually try to look into faces while getting the point of speech or emotional expression, meanwhile others actually try to avoid that, complete opposites, which could be also related to one of the monkey's behaviour “See no Evil” or “Hear no Evil” - trying to ignore the message and keep enjoying the artform.

PAPER WORK:
Arturs Reinholds Learning Agreement