Showing posts with label PROJECTS. Show all posts


As I explained in the previous post I changed my project's idea and collaborate with Ivan Uzunov. His theme was couple relationships and therefore his idea played around wedding scenes.

White Wedding


White Wedding’s inspiration comes from marriages, and all the difficulties they carry. The video is set during the breaking moment of the couple, whom lack affection and caress for each other resulting in the birth of pure evil. 
White Wedding is a music video based around a broken love story, with a ‘dark comedy’ gist. It follows December and June a recently wed couple, they quickly realize their relationship is deteriorating over small arguments. Growing distant they chase each other throughout the corridors of the decaying mansion they once called a happy home. The chase sequence is created in cinematic montages for an opportunity to capture the decaying beauty of the old manor along with December/June’s outfits. As the video extends both June and December become increasingly rough and hateful to one another; it is then June gives birth to a pile of guts (evil) rather than the beautiful baby they once wanted, in return for their aggression, violence and repulsiveness to one another.
“The greatest evil is physical pain.” – Saint Augustine

I told my thoughts and we went in different ways of an emotional show. How it should be represented, what kind of song we should use and so on.

Inspiration


I kept in mind these videos while shooting, tried to express similar look. 

 MUSIC

This was a bit problematic, but I think I did it right. 
Trust-BulbForm - we chose this song because of the mood. It contains many audio overlays I was cutting in post. All cuts blended together using the same rhythm and I think I did well.


Set Location

Back in summer of 2016; I and Ivan went to a couple of ruins and abandoned buildings- Ivan went back to the synopsis and figured it out; dying relationship, lack of love, anger, fear, and havoc. Ivan wanted a distressed looking building with torn down walls and dark corridors, something that was once beautiful in relation to June and December's love. He revisited BULL MANOR in Slough and called the number on the plantation post; We got in contact with the Site Manager Kevin and asked for permission and actually got his approval as long as we were accompanied by a member of Vividline (Daniel Holland) Ivan promised him a copy of the film. We had to shoot immediately, as we only got signed off a day before the shoot. Below are some images Ivan took of the location and permission approval.


We had the permission and then I started my part in a different role. Production... I was writing risk assessment and I was in charge of the project folders.

While Ivan was doing storyboarding, directing and script writing I had my positions as a cameraman, editor, and part as a creator of production pack.

___________________________________________________________________________

Filming

Gear

We used fully only our personal gear. Fujifilm X-T2, which was used for 4k and FHD slow-motion videos. For this camera, we used wide angle 12mm 2.0 lens.Another was DSLR Nikon D5200 with Sigma Art 50mm 1.4 lens. Velbon fluid-head tripod. Flycam-Nano stabilisation system and LED portable lights. We used walkie-talkies for better communication through the house. 

Techniques

Because of Fujifilm x-t2 capabilities in low-light, I was shooting video even using 8000 ISO without any noise. For moving shots I used 4K option so I could stabilize the footage in post. We tried to use fluid movement, so all shots look more cinematic and more immersive in this scary house. We also used post-production dolly zoom, It made the effect called "Parallax". 

Editing

Gear

For editing, I used my custom built PC (WIN 10). i7 3.4 GHz; RAM: 24GB; SSD 128GB; HDD 2TB; GPU 4GB Nvidia GeForce GTX 770. As my monitor, I used Dell U2412M IPS. My sound was monitored on MicroLab Studio 6c speaker set.

Software

I used Adobe After Effects, Adobe Photoshop and Adobe Premiere.

Techniques

I used post production layer masks, different sound merge tools. I used digital parallax effect technique which took me about 4 hours to learn. I was using many subsequences and pre-compositions. Premiere compositions were working all the time together with After Effects and Photoshop.


 Fujifilm X-T2 allowed us to film in flat image profile. Retouching and color edit was easier then ever before. I used colour look up table to set the colour gamma at first. It was easy to pull out the details from dark areas and highlights from overexposed shots.

Facing problems

Because of linked media, pre-compositions in After Effects and some layers that were interactive with photoshop I faced problems exporting the clip. It took ages even on a powerful computer. It did not render out the visuals on the first go. On the second something was wrong with the audio. Only on the third go, we were completely done.

Okay...
I got the dancer two weeks ago. Replied to all questions and had a tutorial with Rosie. Because my initial idea has to be filmed using a fully able-bodied dancer we had some problems representing disability. Ethics and emotional feelings may be touched of someone who is actually a disabled dancer. Therefore I thought about messaging Stopgap community. I emailed 3 times and no response. It is the week before dissertation proposal should be submitted.

I finally got the email back. There is no reason to stop me film this idea... BUT - I have run out of time and I have to find a new way to finish this project.

I was helping Ivan with his project, I promised to be his camera operator. He offered me to collaborate and I agreed with a smile. I took over camera operator and editor role.

In the same time, I kindly said no to all dancers I had for my dance video idea...


White Wedding


White Wedding’s inspiration comes from marriages, and all the difficulties they carry. The video is set during the breaking moment of the couple, who lack affection and caress for each other resulting in the birth of pure evil.
White Wedding is a music video based on a broken love story, with a ‘dark comedy’ gist. It follows December and June a recently wed couple, they quickly realize their relationship is deteriorating over small arguments. Growing distant they chase each other throughout the corridors of the decaying mansion they once called a happy home. The chase sequence is created in cinematic montages for an opportunity to capture the decaying beauty of the old manor along with December/June’s outfits. As the video extends both June and December become increasingly rough and hateful to one another; it is then June gives birth to a pile of guts (evil) rather than the beautiful baby they once wanted, in return for their aggression, violence, and repulsiveness to one another.
“The greatest evil is physical pain.” – Saint Augustine

The Wolf of Wall Street
Intro


"+"

I learned Adobe Illustrator Basics using Lynda.com ( 17.5 Hours )
I learned how to make 2D photographed room into 3D space
I learned how to control animation speed
I learned how to make original transition using only layers
I learned how to work effectively with compositions
I was able to refresh my knowledge working with Audition
I liked the whole workshop in total


"-"

I did not enjoy the workflow on Illustrator at the beginning
I gained weight sitting long hours at the computer


I am happy about my animation bearing in mind the time we had. I would definitely look up more for Cinema 4D usage in After Effects, I would like to make nicer shapes and drawings in illustrator. I am very happy with the result and I think I put a lot of time and effort to bring it up in a level the video is.

The Wolf of Wall Street

It is a 2013 American biographical black comedy crime film directed by Martin Scorsese. The screenplay by Terence Winter is adapted from the memoir of the same name by Jordan Belfort and recounts Belfort's perspective on his career as a stockbroker in New York City and how his firm Stratton Oakmont engaged in rampant corruption and fraud on Wall Street that ultimately led to his downfall.


Here I was, sitting at the desk and drawing circles around this title. I did not know where to start and I basically did a brainstorm. Draw things that I could relate to this film. I watched a documentary about the real wolf of Wall street who has represented in this adventure movie.


Okay...
I was ready to draw all props in illustrator... BUT
before that, I promised myself to find music. A soundtrack that works together with the time when these events that are represented in a film happened.

I chose
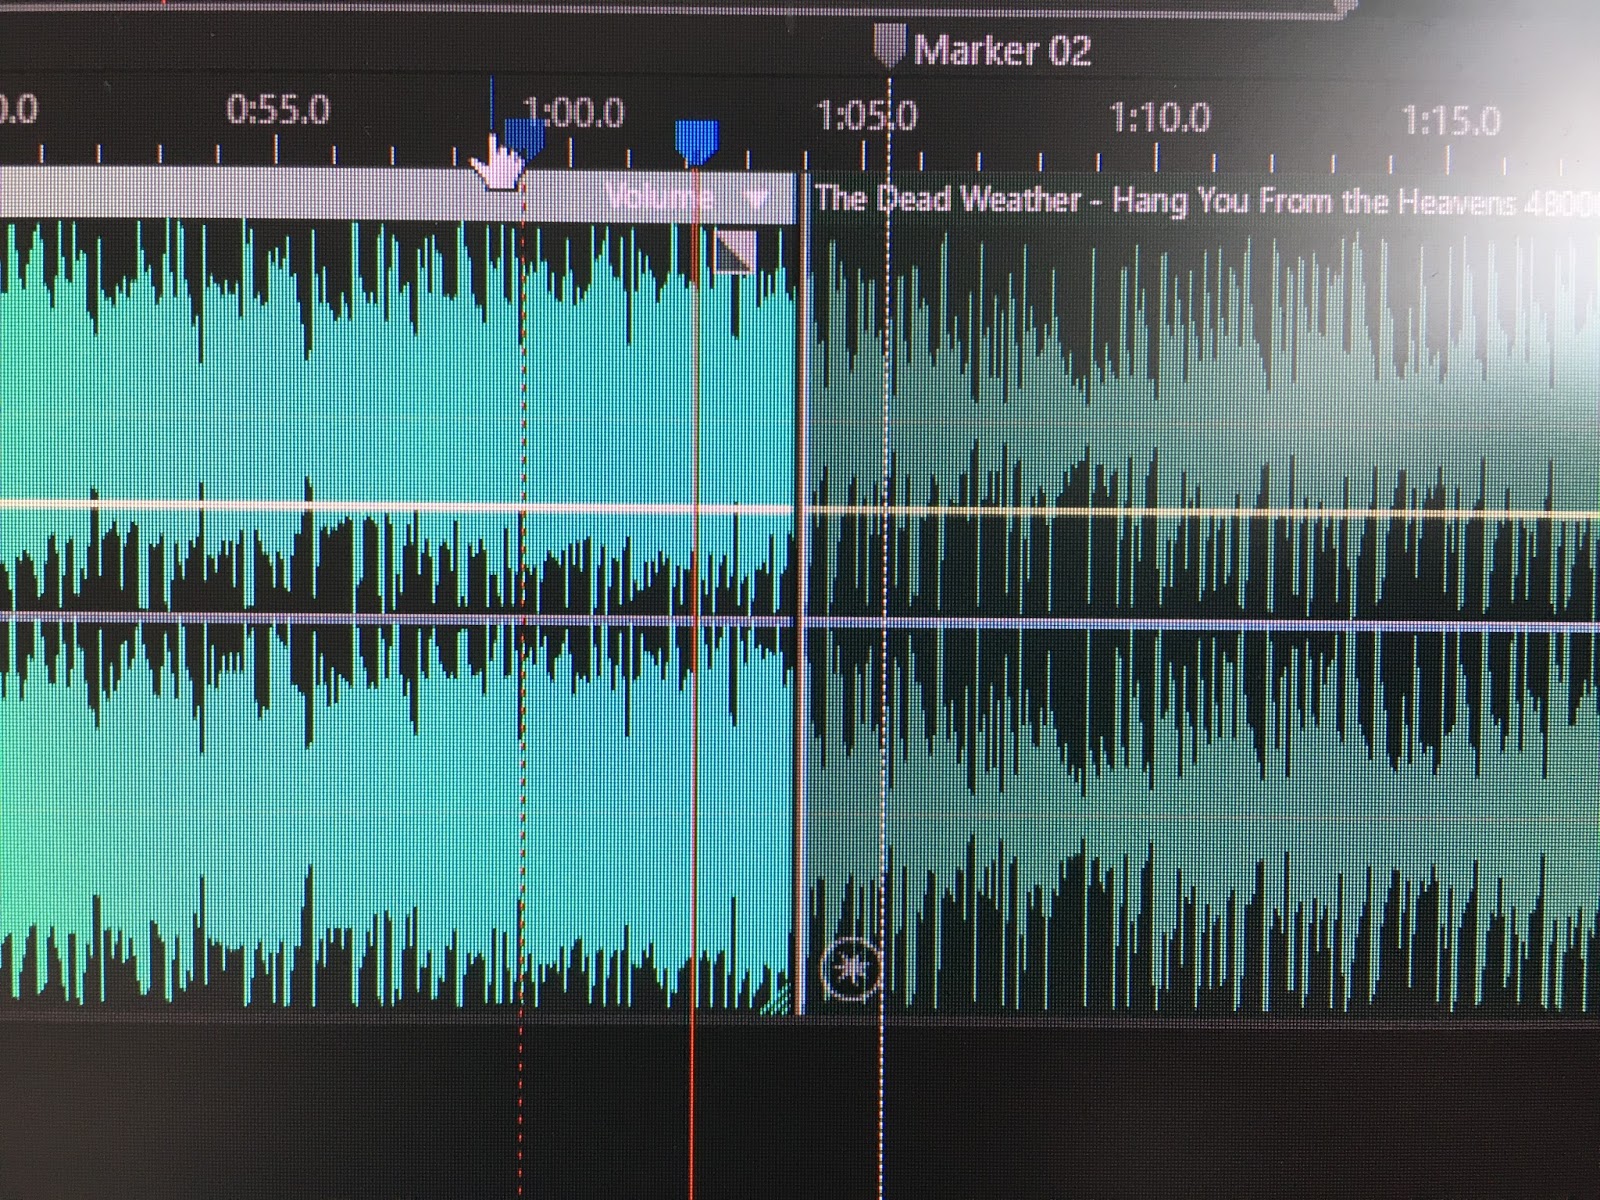
The Dead Weather - Hang You From the Heavens
But that was not it. It has a lot of lyrics and parts that were very repetitive, so I put the audio in Adobe Audition and cut it in pieces. I also add some effects on drums and edit the transitions...
I worked on levels and on stereo channels to make the video more immersive.


I actually went back time to time while I was editing the actual animation. I wanted some bits longer and some bits shorter, therefore I worked on both programs at the same time.

Next part was doing all illustrations.
I started with a bus. That's how the film starts with a young guy in an NYC bus looking for better life.

My inspiration comes from intros
Catch Me if You Can Opening Title Sequence
I liked the simple look and use of colour.
I loved the transitions the most, they are very clever and you cannot predict the next one.
Next - title sequence of Kiss Kiss Bang Bang


Position all layer in 3D space using After Effects was not challenging, I did it once with a bus and everything else was just natural. I got use to the points and axes very quickly.

 I used some silhouettes of buildings to represent big city
 All animations I keyed to change the speed more realistic.
 Here I am changing speed for bus animation and camera
 Many moving layers. starting from a wheel to the whole city.
I animated in a rhythm of the soundtrack. I like pop-up texts and seamless transitions for animation. I liked bright colors and very simple backgrounds. I used a lot of compositions, so the actual project contains 2D and 3D compositions. Some were moving, some were just stills moved by keyframes.

TITLES
I wanted very simple and visible font. I did large scale letters to be readable in time they are on the screen. Each title was replayed many times to make sure that it has on the screen for long time enough, but at the same time not for too long time. I find very annoying if titles are too long on the screen. I like that it is possible to read the text and still appreciate the animation.

I very liked the process of keyframing the camera angles. I have to say that the longest process in the whole project was the illustrator. I spent around 10 hours learning it and about the same time to make all shapes you can see in the next blog post.


It all started with only one photo...


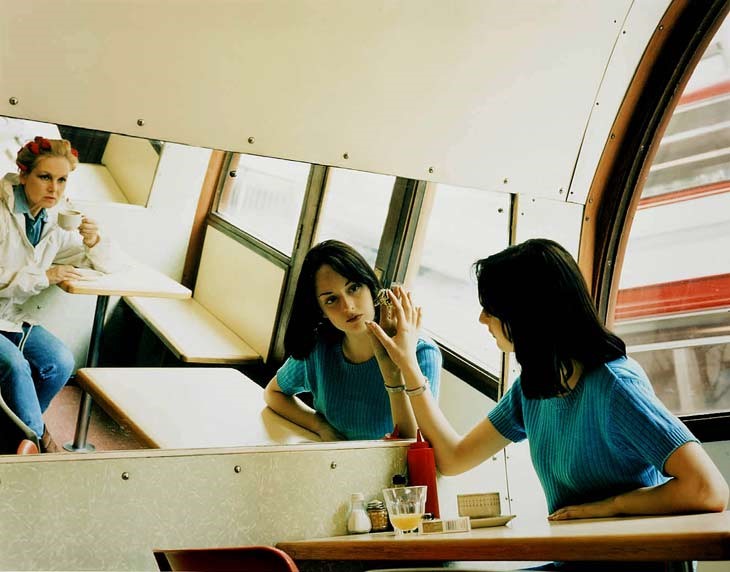
Photograph by Hannah Starkey – Untitled 1997


A photo, which is very simple, but in the same time - very beautiful. A young lady holding a butterfly by the wing.


We had this image as an inspiration to make a 3-5 min long film. It was a process with many obstacles and challenges. First, the idea to make sense and still relate to the picture above. I think we had many opinions in the group how far to pull the idea. Romantic, sci-fi, action maybe comedy genre. My group had different main ideas, different thoughts about the ways of all ideas.


The film was filmed in two days. Files were saved on few hard drives to make sure, everything will be safe and nothing is going to be lost. Later on, I was in charge to deliver all visual files on the server with Victoria's help. That's so far about the process before the edit.


Have I changed thoughts about Avid since the first post?


I think it is very important how experienced you are before looking on new editing software. I mentioned AVID experience before on one of the first "Studio Shoot" posts. I would say it is very complicated editing software, it took me time to figure out how the tools are called. They are very different from other companies. 
My first "VIDEO EDITING" experience I gained when I was 16. It was Sony Vegas Pro. 
I remember it very as very complicated, futuristic and professional tool for videos. My friends were using programs called Movie Maker and iMovie and felt good using something much more advanced. I learned basics of video editing. Dual cameras, layering, 3D texts, stabilisations, cropping, panning, tilting, blending, key-framing clips and volume. I really thought it is something amazing...

Then I got in Adobe Premiere. A completely new world for me. I am not gonna lie - Using Premiere for about 1 month and coming back to Vegas Pro was horrible. I could not believe I was able to edit on Sony Vegas Pro before, it looked so cheap and there was nothing to use for professional editing. Using Premiere for about year I needed to step up more. So I began to learn how to use Adobe After Effects. Seriously, I did not learn it properly till I met Phil in UCA. 

The second year in university, still using Adobe sweets.

"Avid? Industry Standart, hah? Yeaaaa, right... what even is that???"
Opening Avid was like going back to 90ies, but I guess it was only because of the light gray interface. The learning process was very complicated. I would say it was because of how the things were called. I was used to Sony Vegas Pro and Adobe Premiere tool names. It was almost like learning a new language. You have to go through all so you know what the tools actually do and what Avid meant to mean with these names. For example, under effects, there is a tool panel like Illusion FX and without clicking on it I have no idea what even that means, is there 3D effects, maybe transition effects for the text or just textures...

Anyways, figuring out basic tools and trying to edit some sample files I had a bit of taste how it works. To be honest, I have to say I really hated it. I mentioned in the previous post about AVID that I can see how it is good in the industry. It is amazing with transcoding and transferring data from one computer to many others. In my opinion, Avid Media Composer is used for many huge films just because of the workspace. Many editors can work on one film without interrupting others.

Bearing that in mind I would not use Avid for my own small projects, short films or music videos. It is a pro tool for crews and TV industry.


---------------------- The Edit ----------------------


I often face a situation when something goes wrong in the most important moment. The first day of edit - Arturs is at home ill boiling in the bed with 38-degree temperature... How nice is that...

I knew I have to catch up with others in next Monday. Victoria helped me to import all the footage and at that point, everything was a mess...

A mess... where to start from? There I was, sitting on a red seat in front of 3 monitors.

Quickly I looked for a script. I watched every single video and listen to all sound files, wrote a note to each file, which scene, which slate and which take it is. The first day was basically defining files. I organized bins and files. replaced them. On the end of the day I had:

"Day 1" - All videos from the first day [ Renamed - repositioned in order]
"Day 2" - All videos from the second day [ Renamed - repositioned in order ]
"Audio" - Folio sounds
"Audio 2" - Tascam / boom mic records [ Renamed for each take]

...and nothing on the timeline yet.

I don't what exactly but I like a lot more how you can manage your files in Avid Media Composer than in any other video editing software.

---------------------------------------------------------------------------------


I said the software looked like from 90ies because of the interface so I looked up how to change that, setting > interface and made it darker. It looked more like "Premiere". I think bright interface just takes my attention where I don't need it. In a dark one, nothing else interrupts me. Maybe it is just in my mind, but generally, I felt a lot better and more focused on the whole editing process.


---------------------------------------------------------------------------------

Putting files on the timeline...

At the first glance, I had no confidence about what I am doing. I began with the 1st scene, put some in and out points, dropped on the timeline and did some synchronizing with a sound together. After 2 hours of an edit, I realized that I have to make more sense of my edit. Am I going for sad mood? Am I going for an experimental film? 
I looked through and some of the files did not make sense to me. There was one missing scene, which needed to be simulated by another hospital scene, I thought, it will be too obvious. I missed already one day being ill and I was in a bit stressful situation. 

Over sudden, I did not like the idea of the clock. I took that away and use another method of editing. I am not sure who said that but it keeps repeating in my mind, the film must look good even without the sound. 

I wanted to keep nowaday look, a bit futuristic, so I kept hospital scenes where the doctor passes them an iPad to show the results, I liked the fact how things have been changed over the time.

...THE STORY...

Things have changed and they will change more over the years. "Exhale, My Love" in my interpretation is twisted a little bit. Watching the footage I realize how cold are they without speaking to each other. It is not the script that makes like that, but the environment and their behaviors that make the mood. I loved the fact how everything in my film is pretty quiet and moody. 
At the very beginning, Elliot starts coughing and they appear in a doctor's office. Bella and he are very worried about the news, the possibility of cancer. On the first evening, she tries to cheer him up with a campaign. He starts coughing again, Bella calls an ambulance. New results show that he has a lung cancer. These results are serious and Bella cannot take that. She leaves him at the dinner. Next day, Elliot listens to a soundtrack. He remembers moments in winter, Bella smiling, singing to him. Bella hears the music, she comes to the room and leans on the wall. Elliot realizes that and helps her to stand up. He pulls her closer to the body and starts dancing. They both know that Elliot has to go soon. They cannot be together for long. Elliot inhales to say last words to Ella.


All that together.... and I was editing my "Final Edit" sequence.

I cut the clips without any sound and put on the timeline. I got used to tools that are on the left side of the timeline. Selecting single, selecting groups, deselect certain files or track, drag them, change them on the timeline. All tools are very different from Adobe. 
Colour correction. I did curves and basic contrast, brightness adjustments. Different scenes I used different filters. The light was not the same so used contrast and brightness as well. Later on, I offset my film using all four RGB curves and import a letterbox. When I had my letterbox on I had an option to move static files digitally. I tilt few static shots so there is a slight movement. Another reason for the letterbox - I have always the feeling that can't see all information if the image or video file is closer to the ratio 1:1 (square). I think - because how our eyes are positioned we need to have a square for each eye. That would be like 1:2. I feel like 16:9 is not really what I want to focus on. when the file has this frame around I am focusing more on the picture where the operator wants me to look at.

For tablet shots I used pan, tilt, resize and rotation tool to zoom out. I changed keyframe style as well so it is not so linear, but is very smooth and nice. One of the following shots I used stabilization FX. For Elliots dream scene, where Bella is in the snow, I used film grain illusion FX, I used frame morph so frames blend in next to each other. For particular shots, I used also glow effect. 

The sound was difficult for me at first. Although I had everything neatly organized I had issues with synchronizing sounds. In like 4 hour time I got my way around and everything was in time. I keyframed volume and blended sounds together. I used bensound.com to download a music file "Sad Day".

Credits were easy and especially rolling ones. I think Avid has thought about this part. The title sequence was very easy to work out. I liked the process of it.

---------------------------------------------------------------------------------

I think I gained a lot of new experience working with Avid Media Composer. Not only that but also working in a team made me more prepared for other shoots...

 In my opinion, there is only ONE THING I would like to change during the studio shoot. What I saw, I didn't like how my teammates were worried about things on the side. I think the major issue was that the wasted time on planning. I think everything is amazing if you can see how everyone know his role. I studied my role through and I know exactly where I have to be, when I have to shoot, who I have to listen to, who I can ask for help and so on. If you know your role inside out there should not be any misunderstanding and everything should go fluently. 

I enjoyed my group and I am happy that I learned new software just in few weeks. 


First filming day.
As a camera operator, I had huge responsibilities of the film overall. I had to rely on my assistant Ivan and get directions from DoP (TJ). Our first day's first take was an hour later than planned. I knew that I have to do my job spotless so there is no time delay because of me.

While actors were prepared I took my time assembling camera gear with Ivan. Set-up the camera and external video recorded. Checked colors, exposure, focus and formats to be ready for the first take.
We were using Sony EX3 camera which I have reviewed few post back. To record 10-bit 220x video we attached Atomos Samurai Blade external HD recorder. We also used shoulder rig and tripod to make the footage look nicer. As soon as everything was set-up I was looking through Samurai Blade screen and think of options for framing.

All the time I was co-operating with Tj and Ivan. There were many technical issues starting with battery life for Atomos Samurai Blade and ending with wobbly attachment plates for our camera gear. 

For certain scene, we used an on-camera filter. the filter we used suggested by Chris made the look dreamy. 
It took a while to decide and attach. Not only that but every single small detail took time. therefore Natalie and Preston did make sure before each shot everyone is ready.
 --CAMERA READY-- [press record] --READY--... --ACTION--  
After that, I kept the frame in best position. I tried to do my best.
I tried to focus only on my role, so I do mine as good as I can. I heard shouts on other team members and how they have done their roles wrong or not in time because they were focusing on something else during the shoot.
I did and didn't like to work in a team for several reasons.
I liked because I have one job to do and focus on. I am very technical and I like to be next to the gear. I was happy for my role and I understood everything that I was told - different wishes and suggests for framing and movement. I didn't like it because I saw how some of us were sitting down and not doing what they are supposed to do. I just hate slow workflow. I don't like to rush, but I don't like that there are people who can do their roles fast and quick and then there are members who even don't think what they have to do in first place. I liked to work in a team because you know who are your people. What I mean is that there is only one person who can help me - in this case - Ivan Camera assistant and only one person who I have to ask help or tell the problem - TJ - DoP. Roles make a big difference. It is not confusing, I don't have to run around to look for help or even ask random people who I have to look for.

I got this feeling when I am working on my own. If there is a problem I cannot solve, it might be a nightmare to find a solution from others.

I think it was a great experience. It also proved how contacts are made in this industry, simple if you are bad once, you are not going to be picked up next time. Certain roles are made for certain people. Not everyone is in the right place, but when they find it, they can manage it professionally without no doubt.

In the piece, you are viewing five separate screens working as a vocal circuit. Four of the Screens act as distributors of information. Starting from the left (Screen 1) something is said, moving along it reaches the middle screen, upon receiving the news the middle screen reacts, the reaction is later heard/seen by another passing on the story. The middle screen acts as a Breeder and Target for gossip it plays a victim of rumour. Shocked by the words it has come to hear, it addresses the viewer with the words “just between you and me” in hope to seal the spreading; in natural fact, nothing stays private. The circuit loops again, middle screen reacts with anger “Beat the shit out of a pillow” yet making another headline.


The main concept is not about who is in the beginning or in the end. It is all about others who are in the same chain of information. One of them can mislead and draw people to the wrong conclusions. It is really about telling the wrong idea. When you think how someone has given you the wrong information you also think of synonyms such as betray, deceive, dupe, fudge, misrepresent, temp, bait, bluff, lure, scam, hoodwink, deceive, entice, seduce, victimize, suck in, pull wool over eyes, manipulate.


Rumours have been spread all across the world every second. It is an infinitive circuit that cannot be cut. There always will be a source and a point where things are going to be said. 

Our first installation was inspired by a Chinese saying, referring to the three monkeys of their divine pantheon. See No Evil, Hear No Evil, Speak No Evil. In the first idea, we did it simply, A source, three monkeys in the middle and the speaker at the end. Easy to understand - The source wants to say message which goes and reaches the speaker. The information can be truth and it can be misleading because of three persons in the middle.

We developed other ideas keeping the main concept of three monkeys. To represent the more precise real-life situation, we put the main character in the middle, but this time, this character is both - the SPEAKER and the SOURCE.
Why I think it is more realistic? In the first idea source wants to give a message itself, but in another - someone just heard the source saying things and passing them further. Sooner or later the source will know that there is romour of his spoken word. Reacting differently each time, the main character in the middle will be saying what he has heard. the information he has just said gets passed around again. It is almost like an infinitive loop that will never end. Messages keep travel and changing all the time to make the perfect form and expression.

As I mentioned in previous posts, our installation is presenting the result of evil behavior. It is about the communication nowadays... The source can be completely innocent so as the speaker, but the messenger is the one who makes the rules. Particularly in our installation, the way of changing the message is cleared in three ways.

Still playing with the spread of information we wanted to base the piece on the passing and delivery of words, how things said by others can’t be monitored nor controlled. In the piece, you are viewing five separate screens working as a vocal circuit. Four of the Screens act as distributors of information. Starting from the left (Screen 1) something is said, moving along it reaches the middle screen, upon receiving the news the middle screen reacts, the reaction is later heard/seen by another passing on the story. The middle screen acts as a Breeder and Target for gossip it plays a victim of rumor. Shocked by the words it has come to hear, it addresses the viewer with the words “just between you and me” in hope to seal the spreading; in natural fact, nothing stays private. The circuit loops again, middle screen reacts with anger “Beat the shit out of a pillow” yet making another headline.

CIRCUIT

I am working together with Ivan and at the very beginning, we both agreed what are our roles. Ivan is the author of pictures and digital drawings. He was in charge of characters. Meanwhile, my role was "HOW TO MAKE IT POSSIBLE?". To learn 3D animation in less than one month - I did not know how able I am to do it, so I did not risk it. So, Ivan found a solution, he showed me video of Micheal Jackson and I decide to look deeper into the production process

Having in mind this interesting video I look for another. Each video took my attention more and more.


After a good research, I found out what is Morph Motion - Still to Still. Soon I had a RE:Flex plugin on my Adobe After Effects.

I run few tests and realized that on trial version nothing is going to work. It put a huge cross over the image - watermarked.

Having this problem made me think of ways around it. So I came with a solution to generate huge pictures, edit them with the watermark and then just crop needed frame in Adobe Premiere.

I ended up with 11.5K footage on my computer. All videos and sequences were about this size leaving portrait area for FULL HD resolution. 1080x1920p PORTRAIT!

I watched tutorials how to use RE:Flex motion morph for different files - videos, still images and animations. I was very into this technique and I am glad I explored it. First tests went bad, but I got use to it. One portrait took me about 4 hours to turn sideways and open its mouth.

What motion morph does is basically takes the points defined by me and blends together with the image next. I have to go frame by frame and move shapes that are different for two frames between.

Here is a video that is taken for 4.5 hours.

In total, I made fully 6 portraits. Morphing and later on exporting through Adobe Premiere in .MOV H.264 1080x1920p 25fps.

After generating motion from still, it was time for motions. Each motion was trimmed separately like sequence. It was more like a sequence of the sequence of the sequence. Files on files.
As you can see. For each face, I had approximately 22-30 masks and each mask has to be keyframed. Well, that would be easy, but each mask, like layer for hair consisted of 200 points which need to be separately moved because masks are changing their own shape. 

In my opinion, we set roles very clever. Ivan was in charge of characters. As soon as he finished one face I began to draw shapes and move pictures in After Effects. I think his process was not easier, all layers and texture took a long time. Meanwhile, I was working with different sizes, trying to figure out pixel ratio and frame times in certain seconds. 

We had issues, particularly my Adobe crashed for like 5 times. 

I would say that I was excited by the process learning a new technique... but closer to the end and I got very tired. Every single point needs to be checked in all frames, keyframed every single second and because of different drawings, all shapes changed their form every single frame. 

It was challenging, even more, because of something I have never been aware of. I got new experience and a feeling of great teamwork. 

Studio shoot begun with a post weeks ago 'Role- Camera Assistant' - that was my chosen role to research. We had to research individually each department to present for everyone what the roles in film industry actually means. I was happy with my role, because I am technically interested in gear and techniques to use for filming. I have always been passionate about pushing the limits of quality.  I like to generate ideas of stories and main concepts, but it has never been as big as it is about my obsession for technology.

Camera department is my role indeed. I like the looks I could technically achieve. I like to challenge myself to make the shot more stable, more crisp, more detailed, more dynamic, more interesting and exciting. In my spare time I am reading a lot about new editing styles, new lighting, technology and filming techniques. I love to read articles of new Adobe Photoshop updates, how old tools can be used to achieve something new. There is always something new to learn. I am following latest updates of cameras, I am loving to learn new features. For example, I worked with GH4 and that was a good reason to find out what its features means - v-log and 4K MAX. I had what is the difference. Soon I was on articles and YouTube videos. I research from very beginning to advanced controls of V-log and 4K Max features.

I like to always be on top of everything that lately comes out. Before something has been released I have most likely already take a look on specifications, researched certain parts of camera's or other gear's features and trying to understand without looking at actual device. 

I guess my friends call me crazy because of doing it, but that's how I see art behind film, sound and photography.

Returning back to roles, for studio shoot I picked the role - Camera Operator. I guess could not wish any better, I was happy with my role at the very beginning.
 Pre-production was a pain for everyone I guess. I was pretty calm because I knew that my real work will be on the scene. Although I was CO, I helped Tarald a lot with the storyboard.

I drew storyboards with a help form Ivan, Natalie and TJ. When they were done I made them digital. I also helped Umor with lighting plans. We discuss in groups and explained those to Anne Parisio. I took part in lighting plans confidentially cause I had experience on sets like this before. Mostly for small interviews in Latvia, but still - those were whole scenes for full lightning including reflectors and diffusers. I used to help out gaffer at local television in my hometown Talsi.

As I mentioned before, I love research a lot of new techniques and gear, so I have seen many lighting situations and problems via Youtube and Fstoppers.com. I am learning film standards when I do have spare time.
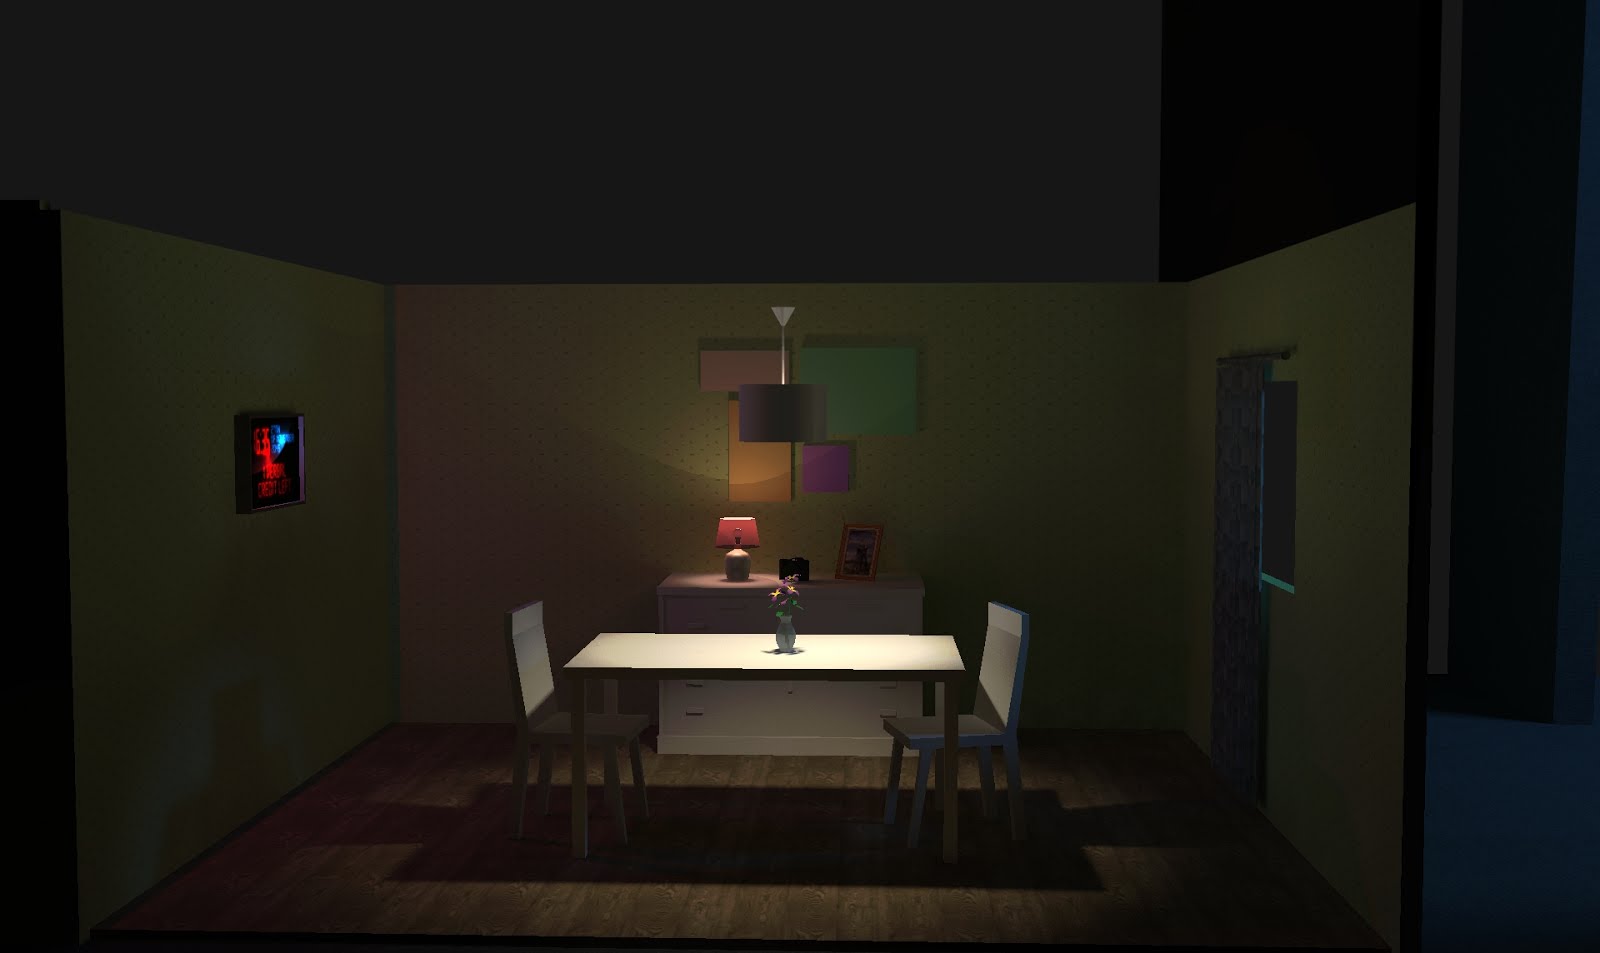
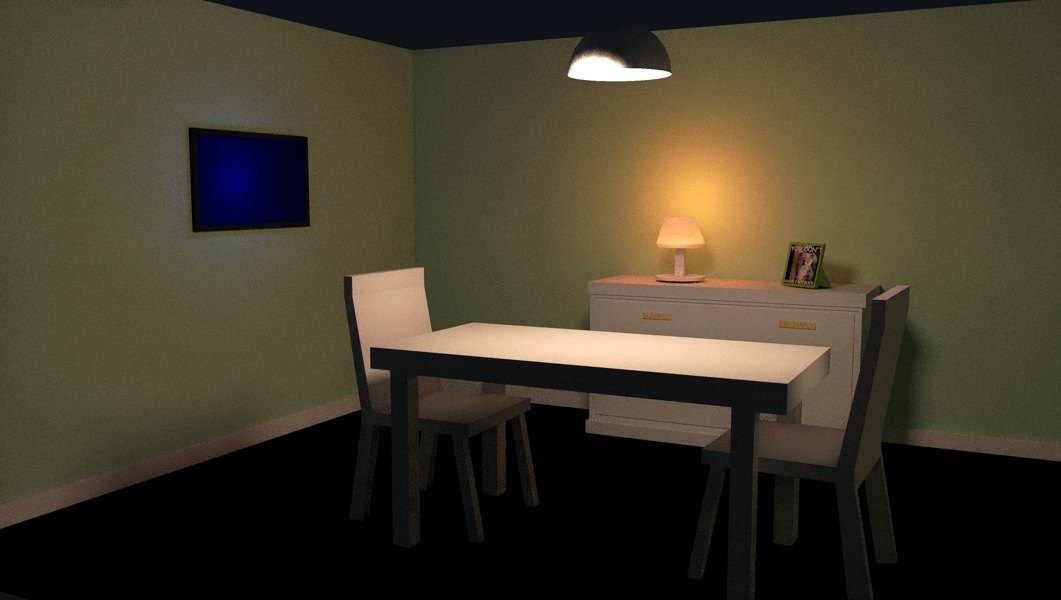
 While everyone was into polishing the story, I used my time for 3D project using SketchUp Pro.
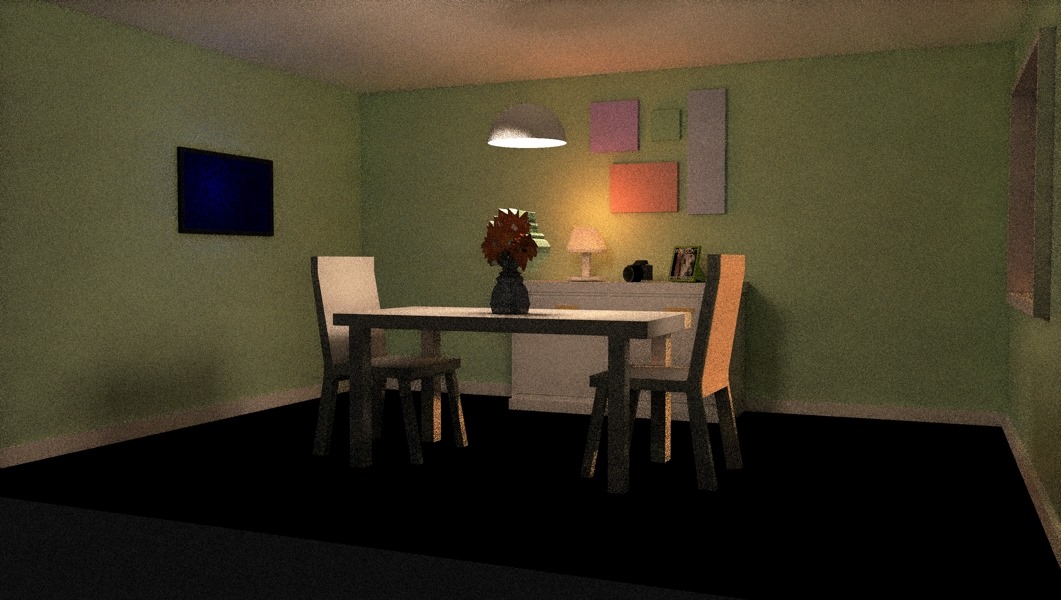
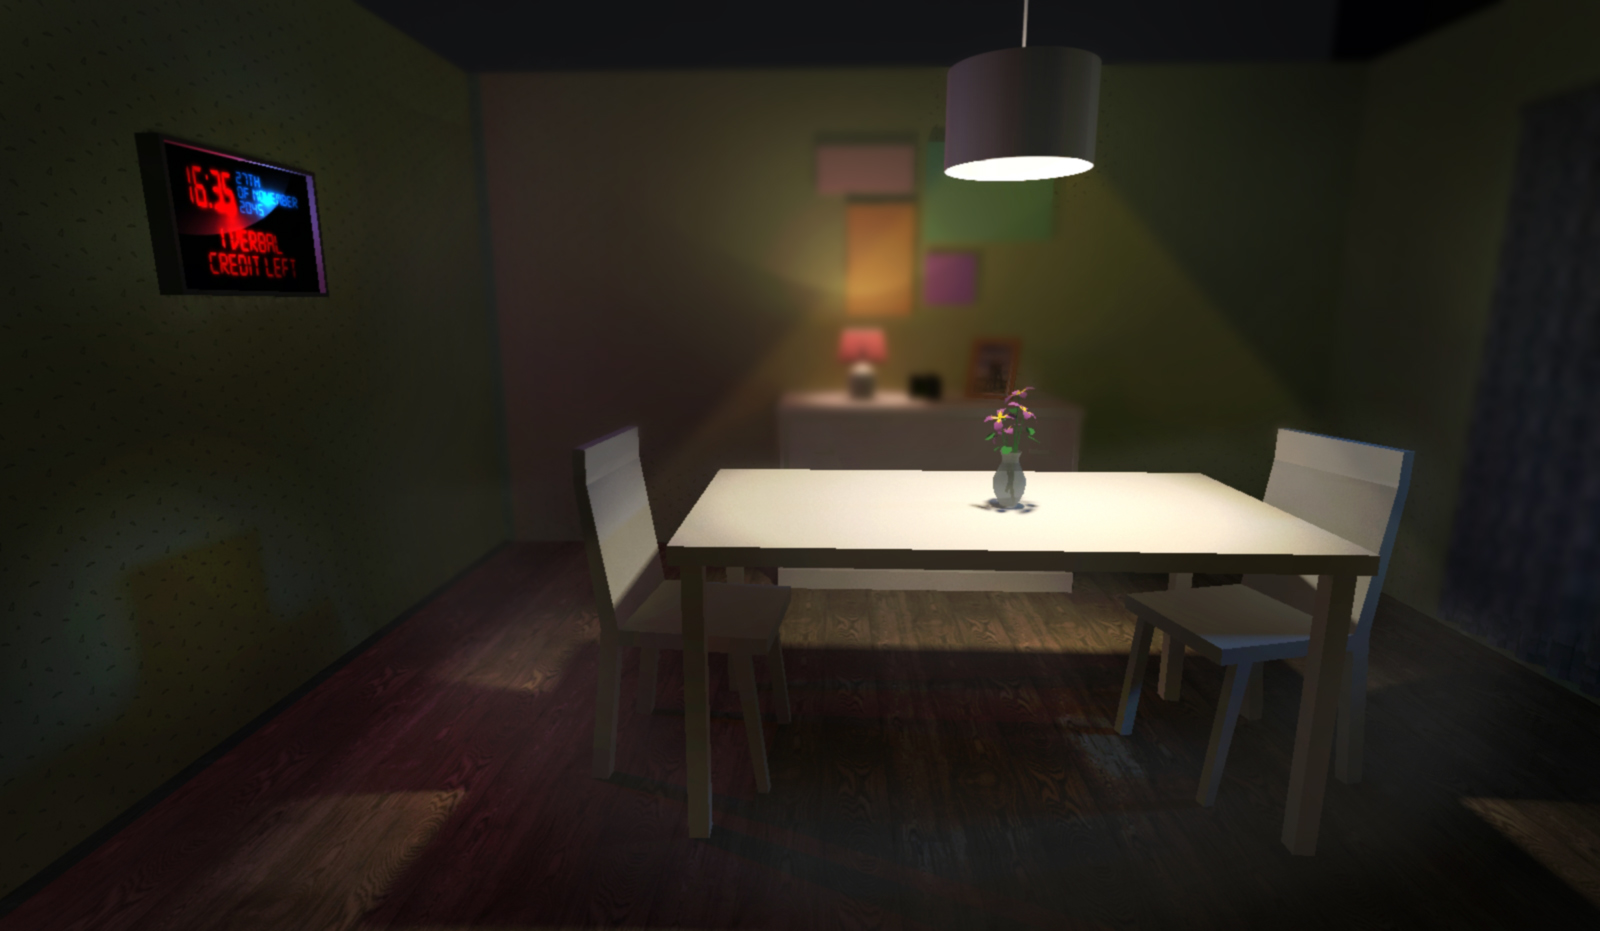
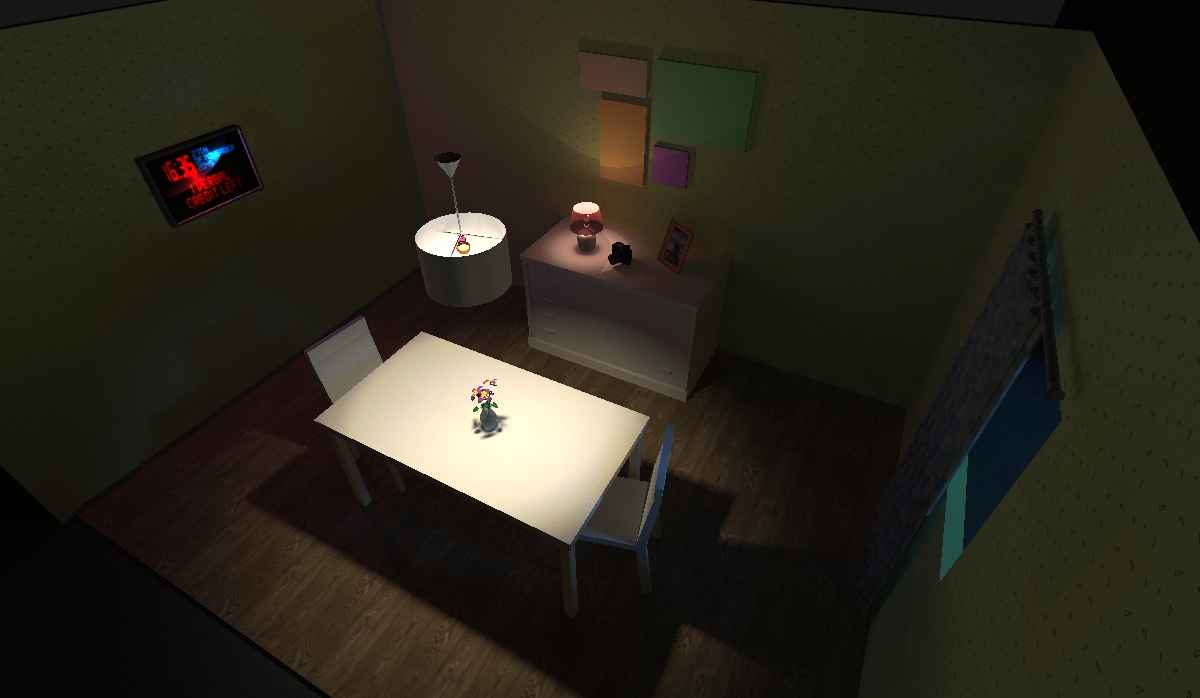
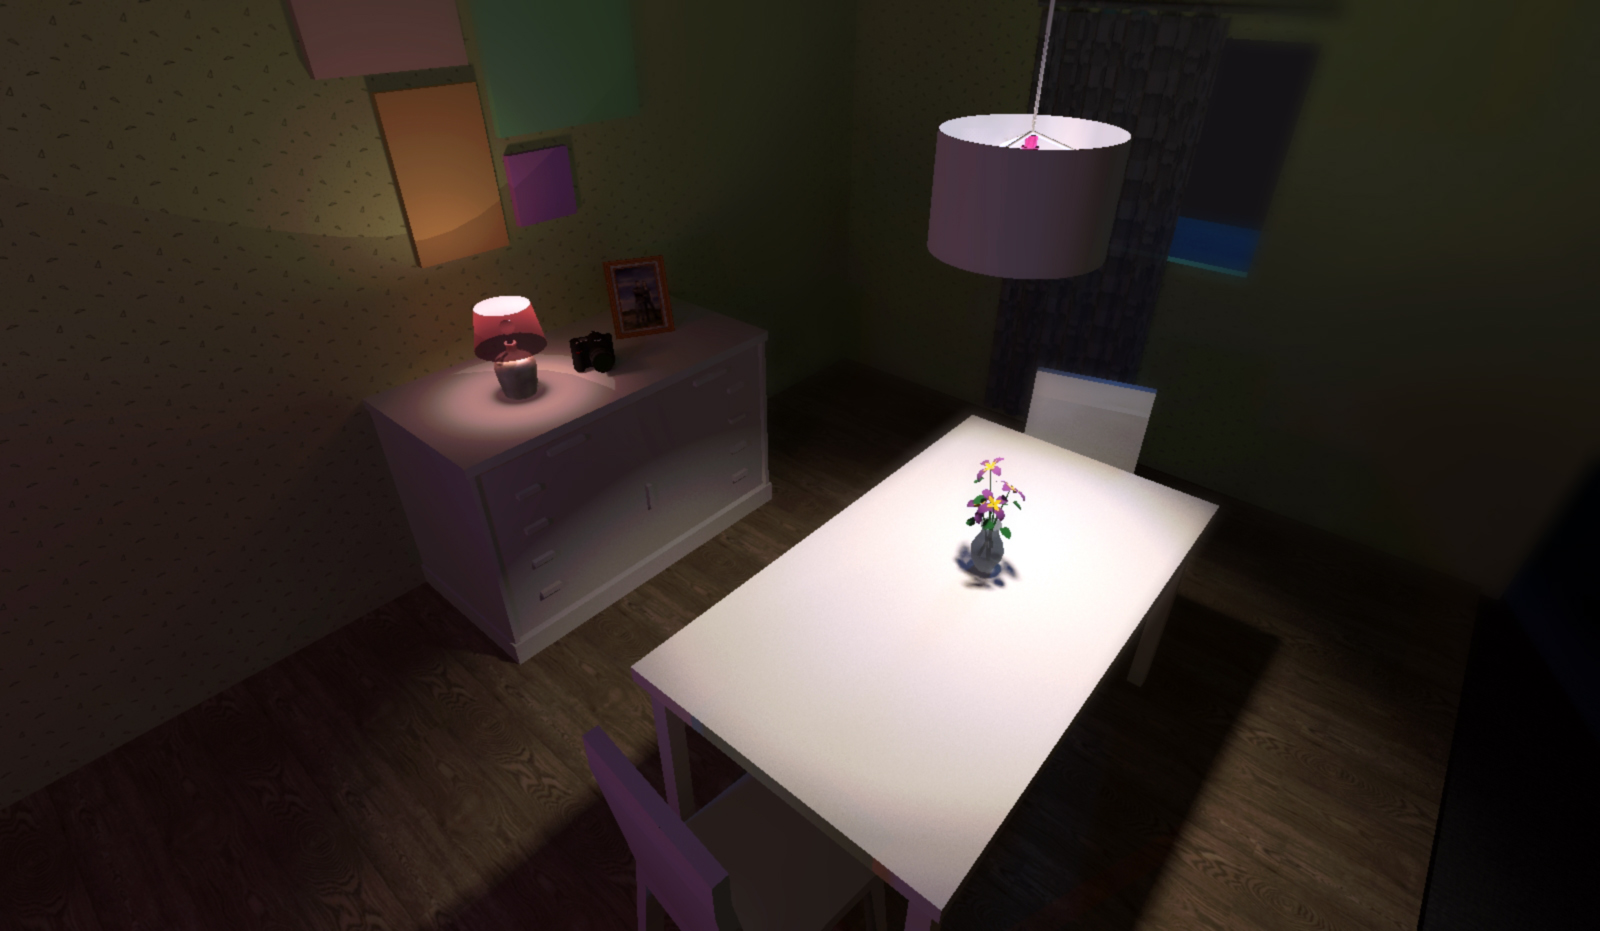
I made a whole set to show previews for possible camera angles and lighting. These sketches and previews from 3D program is at the bottom of this post.

WAS 3D NEEDED?

It was not necessary, but in my view it helps a lot for whole team to understand and feel a bit of the taste what they are going to look at. It can help a lot to see some problems, possible movements, angles and actual space they have to bear in mind.
I did it to make sure I am helping my team as much as possible. We have to put our support and time as much as we can to make our film successful!

Another digital thing I did together with Preston. Something must be on TV's screen. Animation. Preston did design for the clock and whole system which shows word count. My role in this was to make clock alive. I used Adobe Photoshop, After effects and Adobe Premiere to easy change the certain time and move alerts. We setup the word count and made animation so it looks interactive.
...This only one test for alarm. I made folders of files to make sure there is no mistakes and animation makes everyone happy.